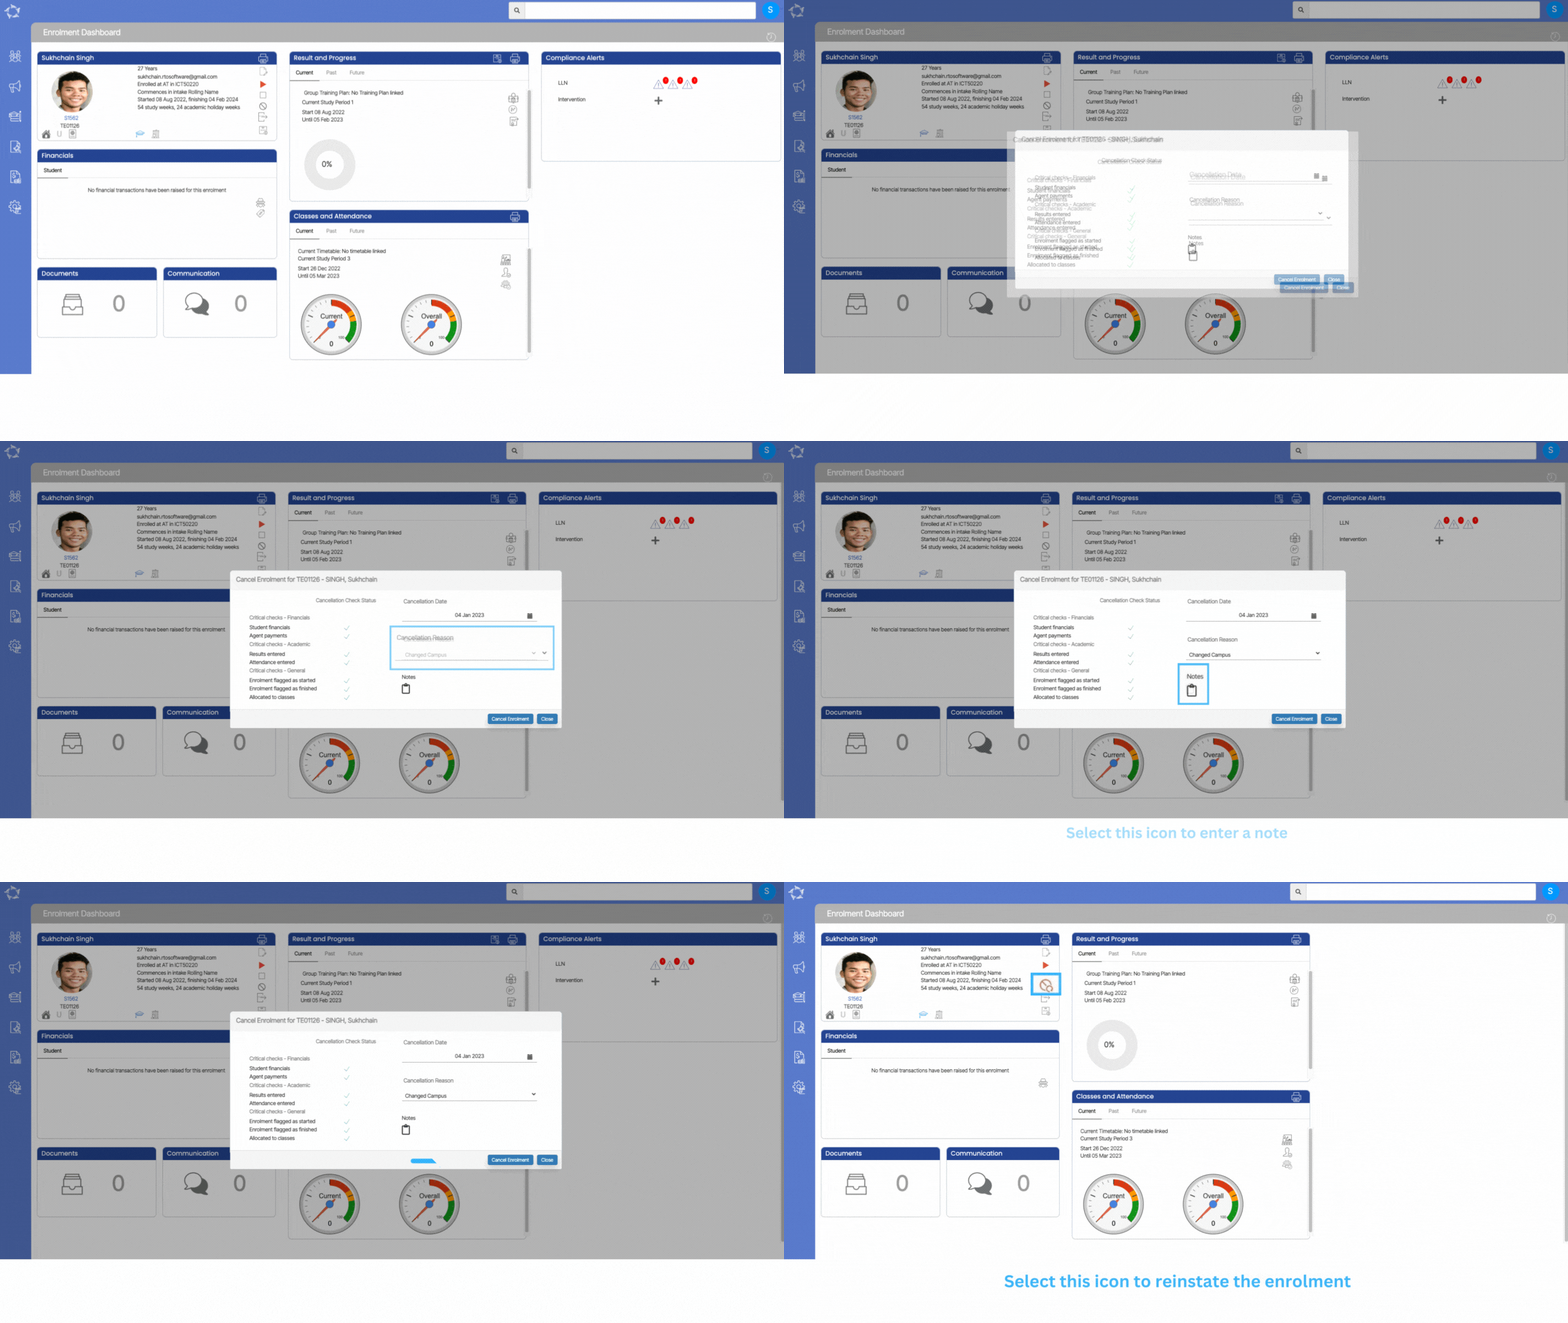
When you select the Cancel icon, a popup will show on the screen. This popup will show you the list of all the critical checks that the system will go through before cancelling any enrolment. If all the critical checks have a green tick in front of them, that means that you are eligible to cancel the enrolment. But, if the check status shows the red cross instead of a green tick then it means that you have to fix it and then only you will be allowed to cancel the enrolment
When all checks result in a green tick then you can cancel the enrolment. Just enter the Cancellation Date, Cancellation Reason and Note.
IMPORTANT: There are some checks you can fix before cancelling if those results in a fail. For example, Enrolment flagged as started or Enrolment flagged as finished. One can easily unstart or unfinish the enrolment from Enrolment Dashboard and then you can cancel the enrolment. By cancelling enrolment, the system will also cancel all the invoices which do not have any transactions related to them. The compliance tile will be hidden after cancelling an enrolment. Also, you will not see any action button on any of the tiles.


