Please see below the list of changes that we have done to the User screen.
| Date Updated | Changes Made |
|---|---|
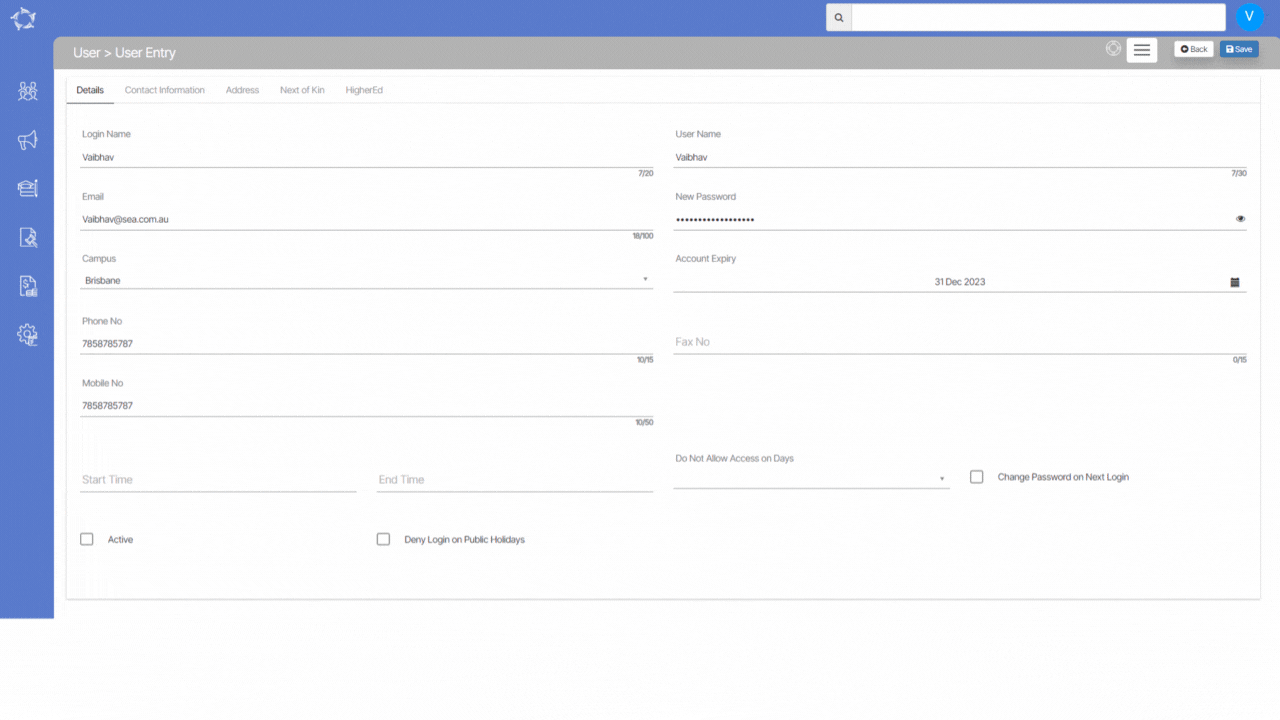
| 03 Nov 2022 | New Icon – View Password |
| 01 Sep 2022 | New tick box – Include Inactive users |
Please see below the list of changes that we have done to the User screen.
| Date Updated | Changes Made |
|---|---|
| 03 Nov 2022 | New Icon – View Password |
| 01 Sep 2022 | New tick box – Include Inactive users |
Below is a list of all the reports available under this menu option in the system. You can see the name of the report with an icon that has the letters CSV in it. Generally, all reports in the system generate a CSV (Comma-separated values) file.
Each report listed below is a link to a post where you can understand the report, and its parameters and view an example of the report.
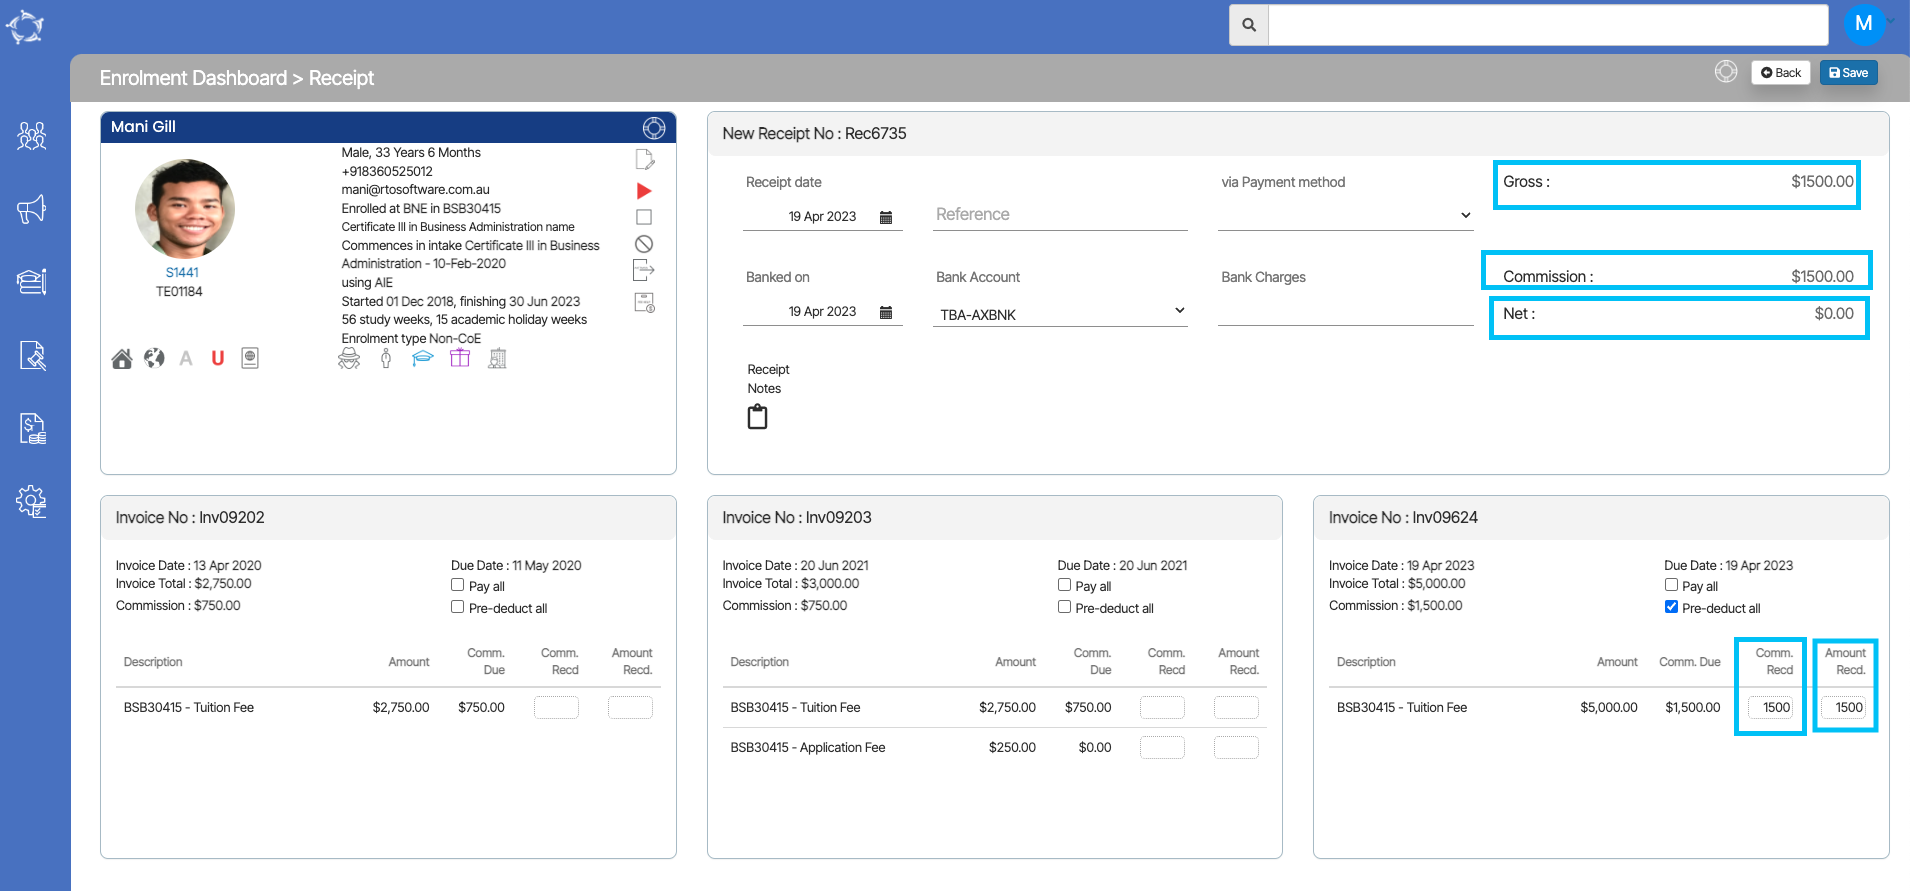
Here’s the scenario that we’re going to answer for you. A student has an invoice worth $5,000 in tuition and the commission on that is $1200. The student gives the agent, the $1200 to pay towards their invoice. But the agent keeps that money that’s full $1200. To pay for their commission amount.
Remember – The student is paying the agent the $1500 to pay to the college. The system knows the gross amount that the student paid $1500 and it knows by the Net amount is $0.00 that the agent kept that money. So it is important for you to d the transaction in TEAMS as shown below.
This is how you would do that. The receipt for the student in teams.
Look for the Invoice and update the commission Received and the Amount Received and the system will tick the pre-deduct tick box for that commission. In the above tile for the receipt, the system will show the gross amount as $1500, the Commission amount as $1500 and the Net amount as $0.00 that college will receive as you can see below in the screenshot.

Here are the recent questions that have been asked and the answers to them.
If the system has not calculated a GST amount for the agent invoice, it is most likely because the Charge GST option was not set for an Agent. There could also be the scenario where the agent did have a charge GST set and the system did calculate the GST in many of their commission invoices, however, a user has gone and edited the agent and unselected this setting. When you do this, any new commission invoices the system generates, will not have the GST calculated.
IMPORTANT – it is important to understand that at the time you do a transaction in TEAMS, the system uses the settings for that transaction as they are. If you then change the settings afterwards, the system will NOT retrospectively go backwards and update data. For example, you have an Agent that was not set with Apply GST and you raise the invoices for an agent. You then realise this mistake and go and update the Agent with Charge GST turned on. The system will not go backwards and update all the agent invoices with the fee in it where the GST wasn’t calculated, it will only use the new setting for the new invoices you raise.
If you have this scenario where you want to fix agent commission invoices to show the GST and currently isn’t then there are two sections to fix this problem.
Those sections are as follows:
Note – If you haven’t made any payment to the Agent, you have the option to delete the Agent from the enrolment and then relink them. By relinking the Agent, you will establish a new connection that allows you to access and view the GST amount for the Agent’s invoices. This means that once you have successfully relinked the Agent, you will be able to see the specific amount of GST associated with their invoices.
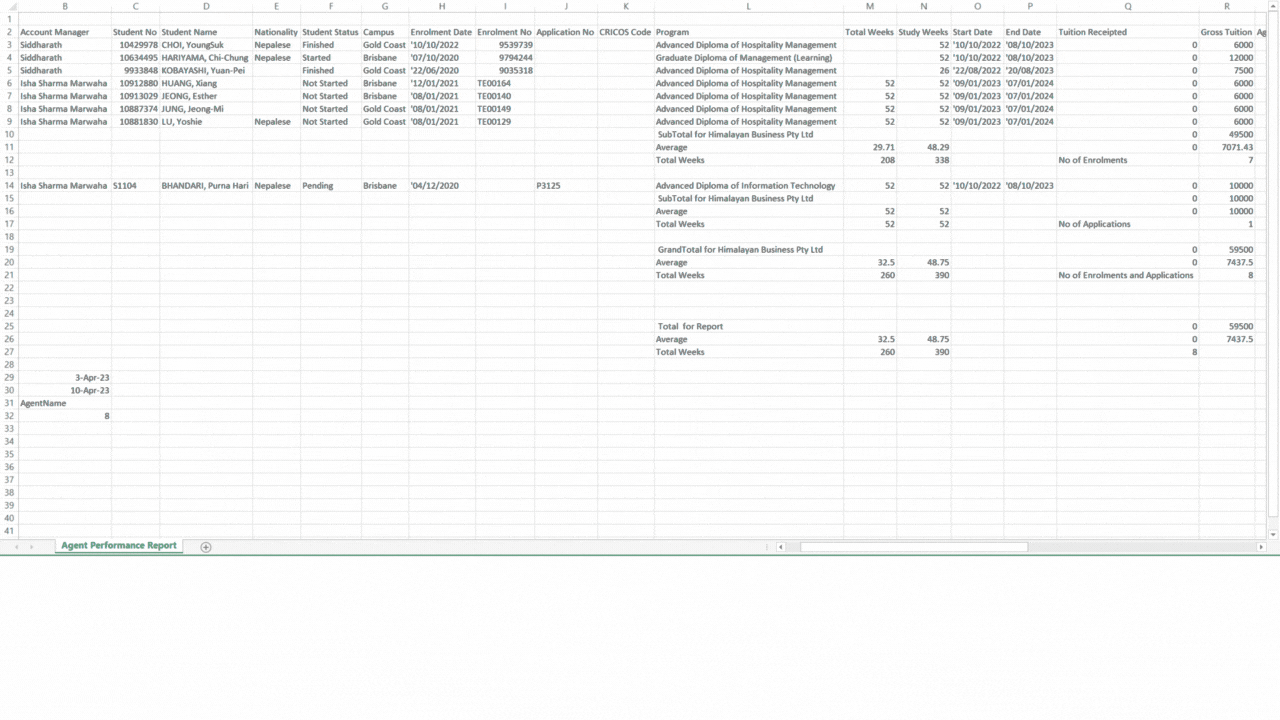
We have recently made some changes to the columns in the Agent Performance Report. These changes include the following:
Please see the below the changes that we made to the Report Dashboard Screen.
| Date Updated | Changes Made |
|---|---|
| 24 Aug 2023 | Report Dashboard – Optimisation |
| 15 Dec 2022 | Report Dashboard Word Report Changes |
| 11 Aug 2022 | Report Dashboard Changes |
Please see the below list of the changes that we have made on the Email Entry Screen.
| Date Updated | Changes Made |
|---|---|
| 21 Sep 2023 | Email Template Welcome Screen – New Email’s Subject Column |
| 10 Aug 2023 | Email Template Screen – New Font Size Option |
| 06 04 2023 | Email Template – Visa Expiry Date new merge field |
| 23 02 2023 | Email Template – New Merge Fields |
Creating a timetable from scratch can be a time-consuming and a tedious task, especially if the same pattern of classes and schedule repeats after a certain period of time. However, there is a more efficient way to create a new timetable with the same pattern, and that is by using the copy timetable functionality.
This feature allows you to duplicate an existing timetable and make necessary changes as required. By doing so, you can save time and effort in creating a new timetable from scratch while ensuring that the schedule and class pattern remains consistent with the previous timetable.
From the Timetable Welcome screen, you can see a copy timetable icon under the Actions column for each timetable entry in the grid. Select this icon to create a copy of the existing timetable.
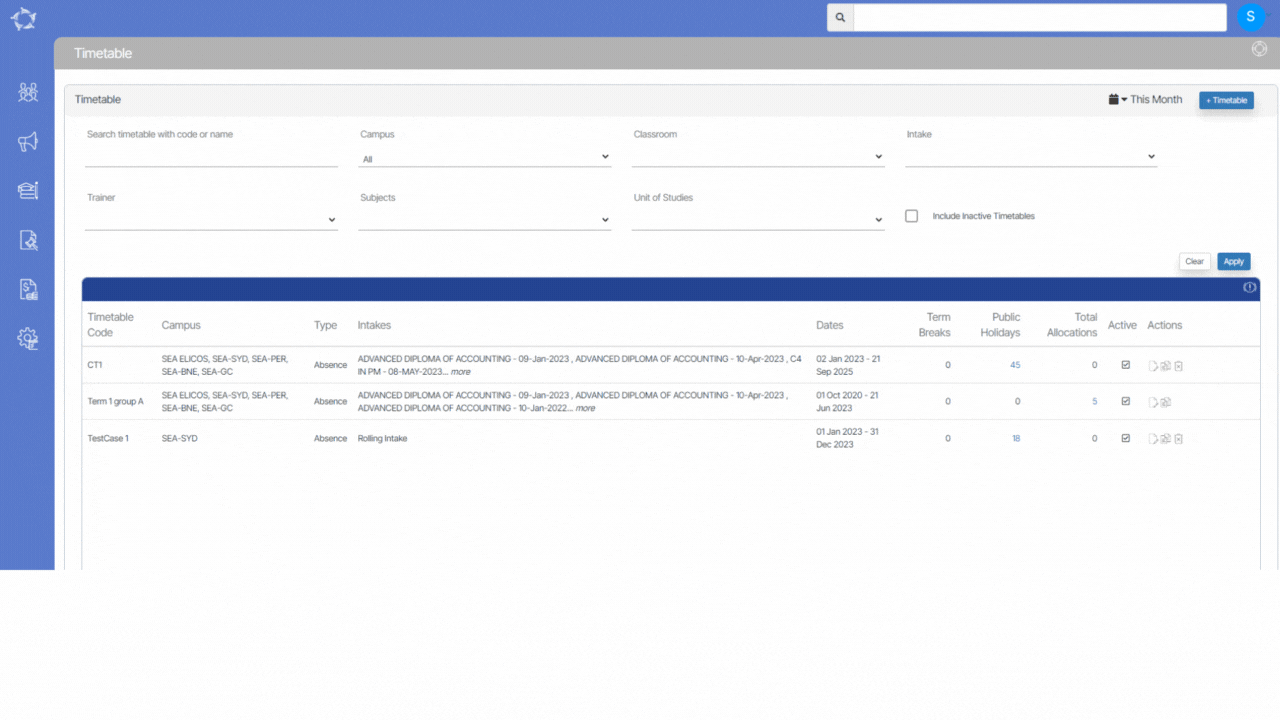
Please select the below steps to make changes to the copied timetable.
Each user will have different permissions, including what campuses they can see enrolments and other information for.
Based on this, when a user goes to the Student Dashboard or even the Applicant Dashboard, based on the campuses they are linked to and logged in as, will determine what enrolments and/or applications they can see.
For example – In order to view a student’s enrolments in different campuses, the user must have the necessary access permissions for both campuses in TEAMS. If the student is enrolled in two different campuses, such as Campus 1 and Campus 2, the user will only be able to see both enrolments if they have the appropriate permissions for both campuses. Without access to either one of the campuses, the user will not be able to view the corresponding enrolment.
Note – If you are not able to view all enrolments or applications for certain students/applicants then speak to your manager. If you or they need further assistance with this, then please contact our support staff.