Program – GTP

This screen will show the GTP code, GTP Name and their Dates in the grid that are linked to the Program as shown below:

Note: GTPs can be created and linked to a program from the Group Training Plan Entry screen.

If you have any queries, please do not hesitate to contact us on 1300 85 05 85 or email us via support@rtosoftware.com.au

Program – Subjects

Program > Program Entry Burger Menu > Subjects

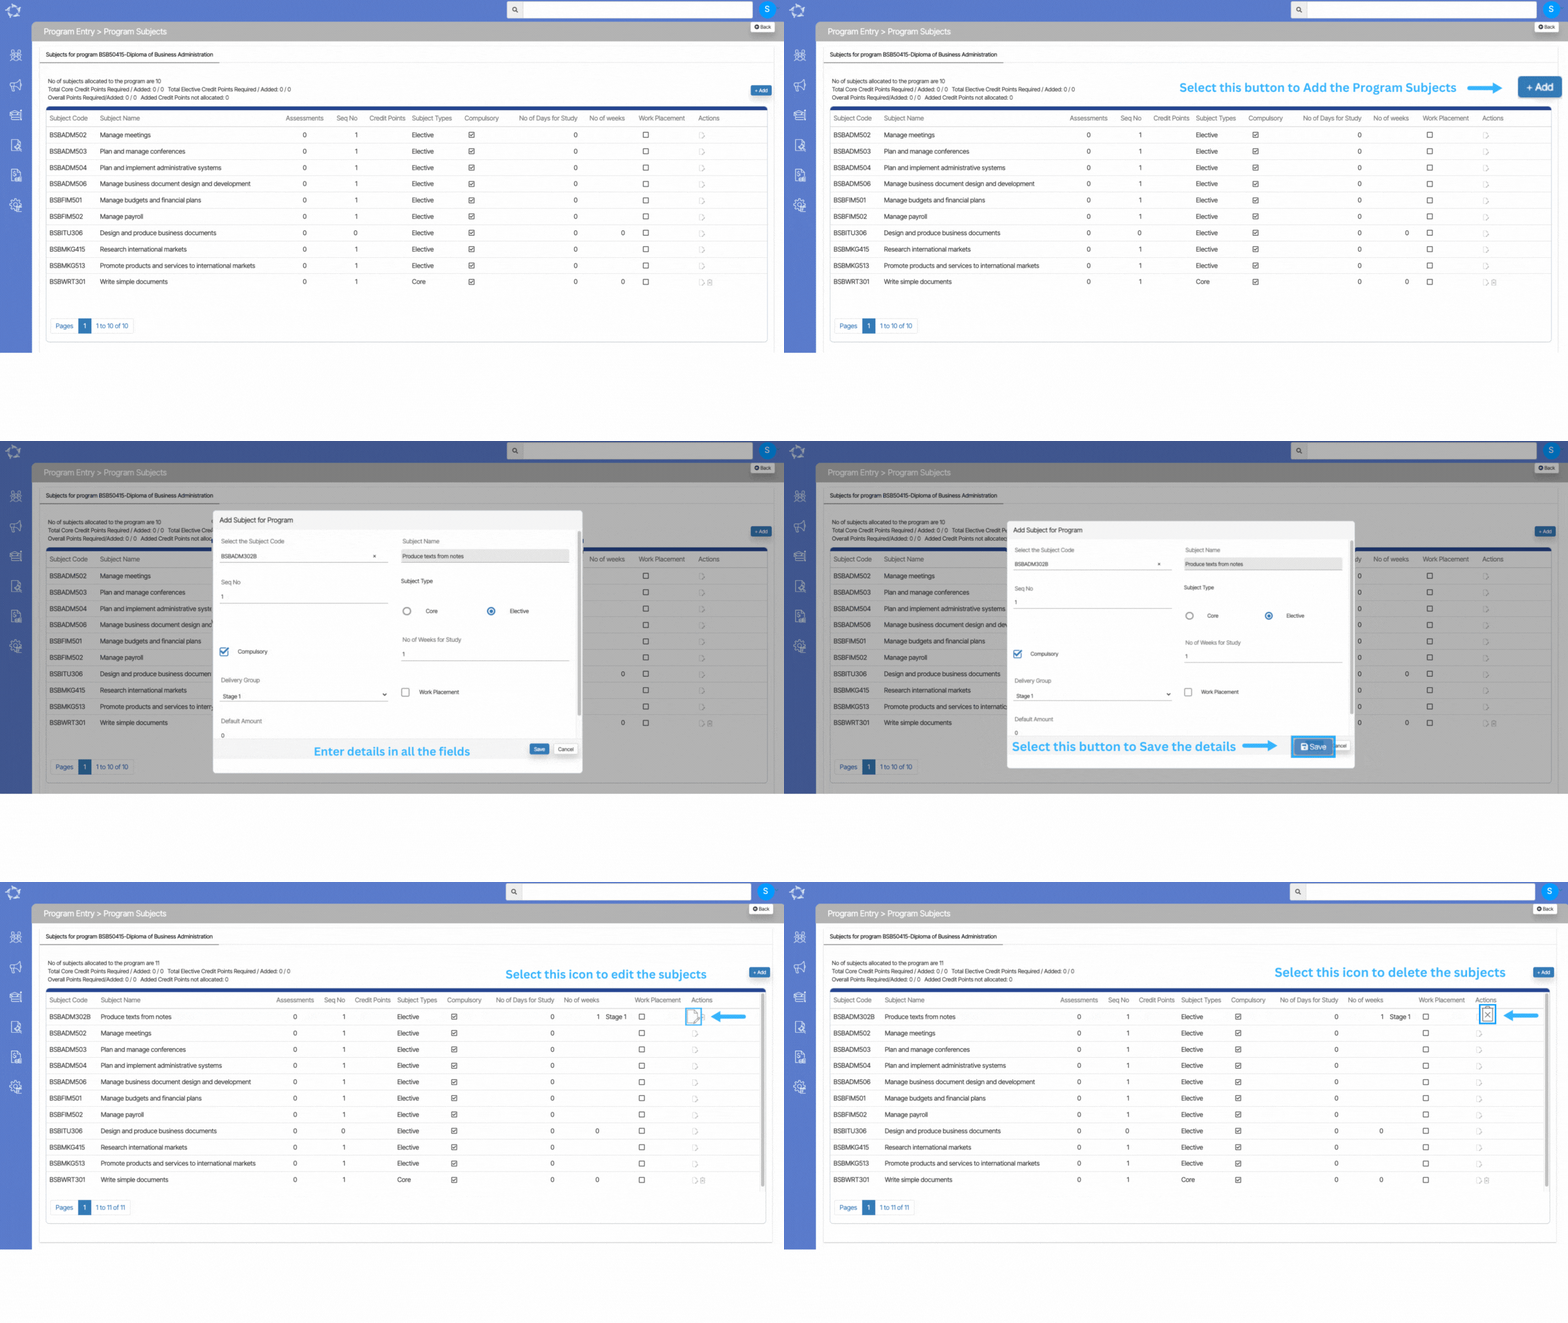
The program Subjects screen is where you can link subjects to the new program created in the system. If you already have a program and you are linking a subject to the existing program then the system will show you all the other subjects in the grid that are allocated to the Program. You can also edit the subject by selecting the edit icon under the actions column.

If you have created a brand new Program and you want to link the subjects to it, you need to select the +Add button on the right hand side of the screen. Once you have selected the Add button, you will be presented with the pop window where you need to do the following steps.

Explanations of the field below:

FieldsExplanations
Select the Subject CodeIt is a magic search field, where you have to write the initials of the subject code and then you can select the subject code from the suggestions below.
Subject NameIt is a read-only field, which will be auto-populated when you select the subject code
Seq NoHere you have to write the sequence number of the subject. for eg if x,y, and z are three subjects then you can write seq no as x as 1, y as 2, and z as 3.
Subject TypeSelect the radio buttons as core or elective.
CompulsorySelect the tick box to make the subject compulsory.
No of Days for StudyHere you can add the number of days required to study a particular subject.
No of Weeks for StudyHere you can add the number of weeks required to study a particular subject.
Delivery GroupHere you can select the delivery group from the dropdown.
Work PlacementSelect this tick box if the subject is work-based, not classroom-based.
Default AmountIf your RTO is using subject invoicing, then you can add the amount to study the subject in this field.

Change – New Application > AVETMISS Address tab

While creating a new applicant, if you are not selecting the AVETMISS tick-box on the New Application > Details tab then the system will not allow you to add the AVETMISS address on the address tab.

As the AVETMISS address fields are read-only fields and you will only be able to add an AVETMISS address under the address tab if you select the AVETMISS tickbox.

If you have any queries, please do not hesitate to contact us on 1300 85 05 85 or email us via support@rtosoftware.com.au

Change – Agent Entry Screen

Dashboard > Marketing > Agent > Agent Entry

We have introduced a new tick box called ‘No Longer Accepting Applications‘ on the Agent Entry screen as shown below:

Note – If this new tick box is selected for an agent then that particular Agent will not be visible under the agent magic search field while creating the applications. So instead of making an Agent inactive, we recommend you to use this new tick-box.

Important Links

UPDATE – Thursday, 16 June 2022

IMPORTANT: A new TEAMS update is scheduled.

Your TEAMS site will be updated on

Thursday, 16th of June, 2022

This is an important preview email
of what’s coming on your site soon

As you know, we have been continually improving and adding new features to TEAMS. We strongly believe in making software that helps our clients gain better efficiencies and improve their operations.

Note: You may need to alert other team members within your college as the changes may affect their role or department.

Please spend a few minutes going through our What’s New and Newsletter emails. It will not only help you maximise the time and cost savings, it may be absolutely vital for your College’s Compliance with the latest regulations.

To ensure that you are kept well informed with all that is new within TEAMS, we are going to be releasing a detailed What’s New update via email every two weeks.

We strongly recommend that you take your time and read this (and future update email/s)

You may need to discuss new upcoming features with the relevant decision-makers or team members. Our help site is under maintenance. Please find the attached PDFs in the links below.

Major Process Changes

General /Small Improvements

Please review the changes and if something doesn’t make sense of you would like further clarification after reviewing it, please feel free to contact our Support team. 

There are a number of new initiatives and changes in the pipeline for the next update (due 30th June). We are currently working on a new report engine, SMS gateway app, and more…..

Remember, we are always open for feedback, and a big thank you to so many of you who have been actively participating in helping us bring these new improvements to life.

Your input and engagement are key in helping us improve and we really appreciate it.

Any questions, please feel free to reach out to us and we look forward to serving you to the best of our ability. 

All the best from all of us here at RTO Software.

Follow us on Facebook and Instagram

If you have any further questions,
please feel free to contact our support staff on
1300 85 05 85 or support@rtosoftware.com.au
Remember – these changes go live on Thursday, 2nd June 2022. 


Have a great day!

Visa Information – Applicant Dashboard

Applicant Dashboard > Applicant Profile Tile > Visa Information Icon

history of changes

This screen will allow you to add/edit the visa details of an applicant at the application dashboard > Visa Information Screen

IMPORTANT – Once the application is converted to a student, you won’t be able to add/edit any details at the applicant level. However, you can make the changes from the Student level.

Below are the steps to add the visa details for an applicant.

  • When you select the icon on the Applicant Dashboard, it will take you to the edit visa details screen where you can select the  button to add the visa details of an applicant.
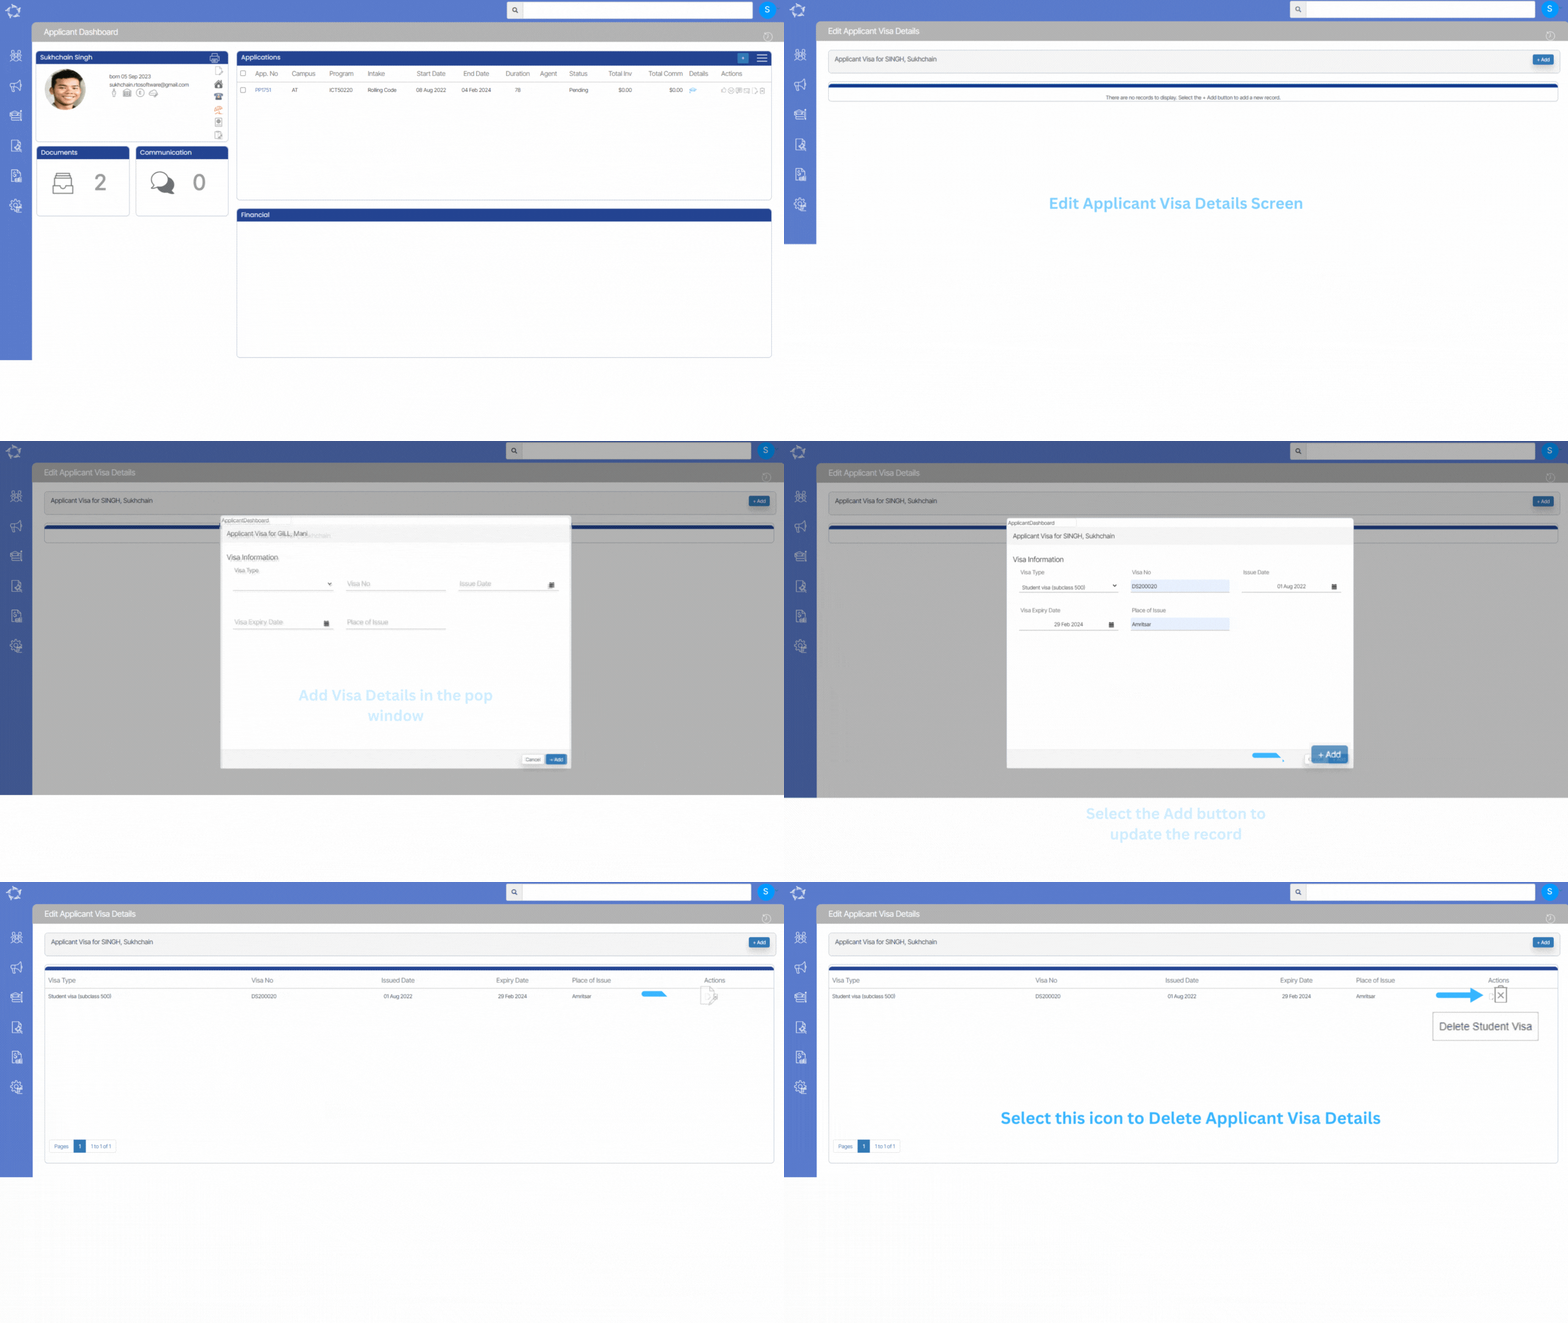
  • Upon selecting the add button, a popup window will open where you can add the visa information for the applicant and select the +ADD button.
  • Once you select the Add button, it will appear in the grid.