Change – Added new column on the Timetable Welcome Screen

Dashboard > Academics > Timetable

We have added a new column Total Allocations on the Timetable Welcome Screen which shows you the total number of enrolments linked to that particular timetable.

Once you have allocated a class to any enrolment that enrolment will be added to the count under the total allocations column for the timetable of the enrolled class as shown below:

Once you will select the count under the total allocations column, the timetable allocation listing screen will open. This screen will show you the list of all allocated enrolments to this timetable.

If you want to send Emails and SMS or create Contact Log then you can select a tick box for all the students from the tick box column and select the burger icon as shown below:

You can also download the CSV file for all the allocated students from the CSV icon as shown below:

Academic Template Entry

Overview

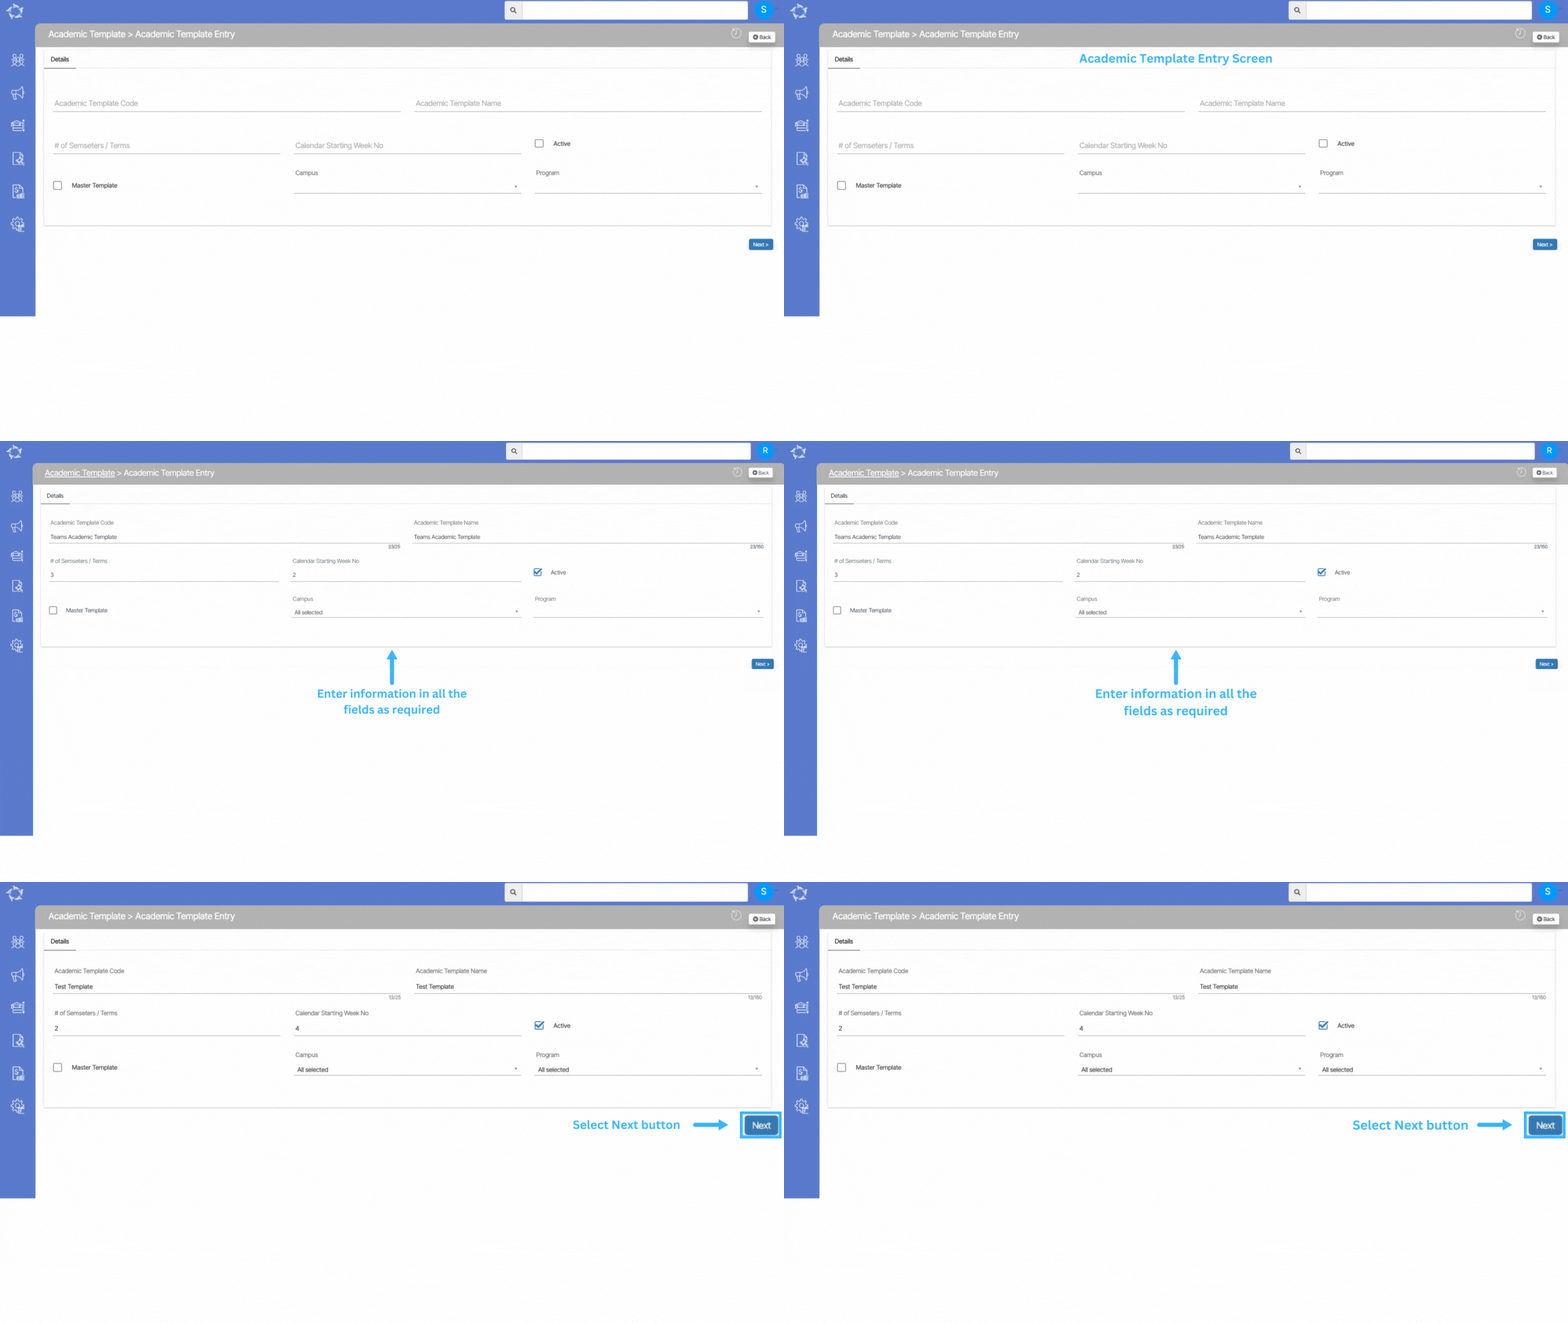
When you select the +Academic Template button on the Academic Template Welcome screen, the system will redirect you to the Academic Template Entry screen. This is where you will initiate the process of creating a new academic template within the system.

Note – Any changes made on this screen will not be saved unless you proceed to the next step and completes all the necessary actions in the academic template.

Explanation of the fields below:

FieldsExplanations
Academic Template CodeDepending upon your requirements type the academic template code in the field
Academic Template NameDepending upon your requirements type the academic template name in the field
# of Semesters/TermsWrite the total number of semesters/terms. For example 2 or 4
Calendar starting week noWrite the calendar starting week number in this field
ActiveSelect this tick box to activate the academic template
CampusIf you have multiple campus and wanted to apply this template to all of your campuses then you can select them by selecting the tick boxes.
ProgramIf you wish to apply multiple programs to the template then you can select them from the dropdown

Once all the above fields are selected and updated then you need to select the next button to complete the further actions. To know more select the next arrow button below.

Subject – Assessments

When you click on the Assessments option, the assessments screen will open, where you can add assessments of the subject as shown below:

When to select the “+Add” button, an assessment entry screen will open as shown below:

Explanation of the fields below:

  • Object Type – From the dropdown menu you can select the object type.
  • Select Subject – It is a magic search field, where you can select a particular subject.
  • Assessment Code – Here you can write assessment code.
  • Assessment Name – Here you can write the assessment name.
  • Assessment Description – Here you can write an assessment description.
  • Sequence No. – Here you can write the sequence number of the assessment.
  • Allow Multiple documents – Tick this box if you want to upload multiple documents with one assessment.
  • Allow Grading – Tick this box if you want to mark grades for an assessment.
  • Allow Resubmission – Tick this box if you want to allow an assessment to be resubmitted.
  • Active – Tick this box to make an assessment active.

Then hit the save button, to save an assessment. you can see the saved assessment in the grid below:

If you have any queries, please do not hesitate to contact us on 1300 85 05 85 or email us via support@rtosoftware.com.au


Subject – Burger Menu

Once the subject is created you will see a burger menu on the Subject Entry Screen as shown below:

When you select the burger menu, you can see different options under the burger menu as shown below:

Explanation of the options under the Burger menu

If you have any queries, please do not hesitate to contact us on 1300 85 05 85 or email us via support@rtosoftware.com.au

UPDATE – Thursday, 30 June 2022

IMPORTANT: A new TEAMS update is scheduled.

Your TEAMS site will be updated on

Thursday, 30th of June, 2022

This is an important preview email
of what’s coming on your site soon

As you know, we have been continually improving and adding new features to TEAMS. We strongly believe in making software that helps our clients gain better efficiencies and improve their operations.

Note: You may need to alert other team members within your college as the changes may affect their role or department. 

Please spend a few minutes going through our What’s New and Newsletter emails. It will not only help you maximise the time and cost savings, it may be absolutely vital for your College’s Compliance with the latest regulations.

To ensure that you are kept well informed with all that is new within TEAMS, we are going to be releasing a detailed What’s New update via email every two weeks. 

We strongly recommend that you take your time and read this (and future update email/s)

You may need to discuss new upcoming features with the relevant decision-makers or team members. Each of the changes outlined also have hyperlinks that you can click to take you to our help website for the further detailed explanation. 

With all that in mind, please review some of the key points outlining the list of changes below –

Major Process Changes

Reports Related Changes

General /Small Improvements

Please review the changes and if something doesn’t make sense or you would like further clarification after reviewing it, please feel free to contact our Support team. 

There are a number of new initiatives and changes in the pipeline for the next update (due 14th July). We are currently working on the SMS gateway app and more…..

Remember, we are always open for feedback, and a big thank you to so many of you who have been actively participating in helping us bring these new improvements to life.

Your input and engagement are key in helping us improve and we really appreciate it.

Any questions, please feel free to reach out to us and we look forward to serving you to the best of our ability. 

All the best from all of us here at RTO Software.

Follow us on Facebook and Instagram

If you have any further questions,
please feel free to contact our support staff on
1300 85 05 85 or support@rtosoftware.com.au
Remember – these changes go live on Thursday, 30th June 2022. 


Have a great day!

Change in Current Student Report

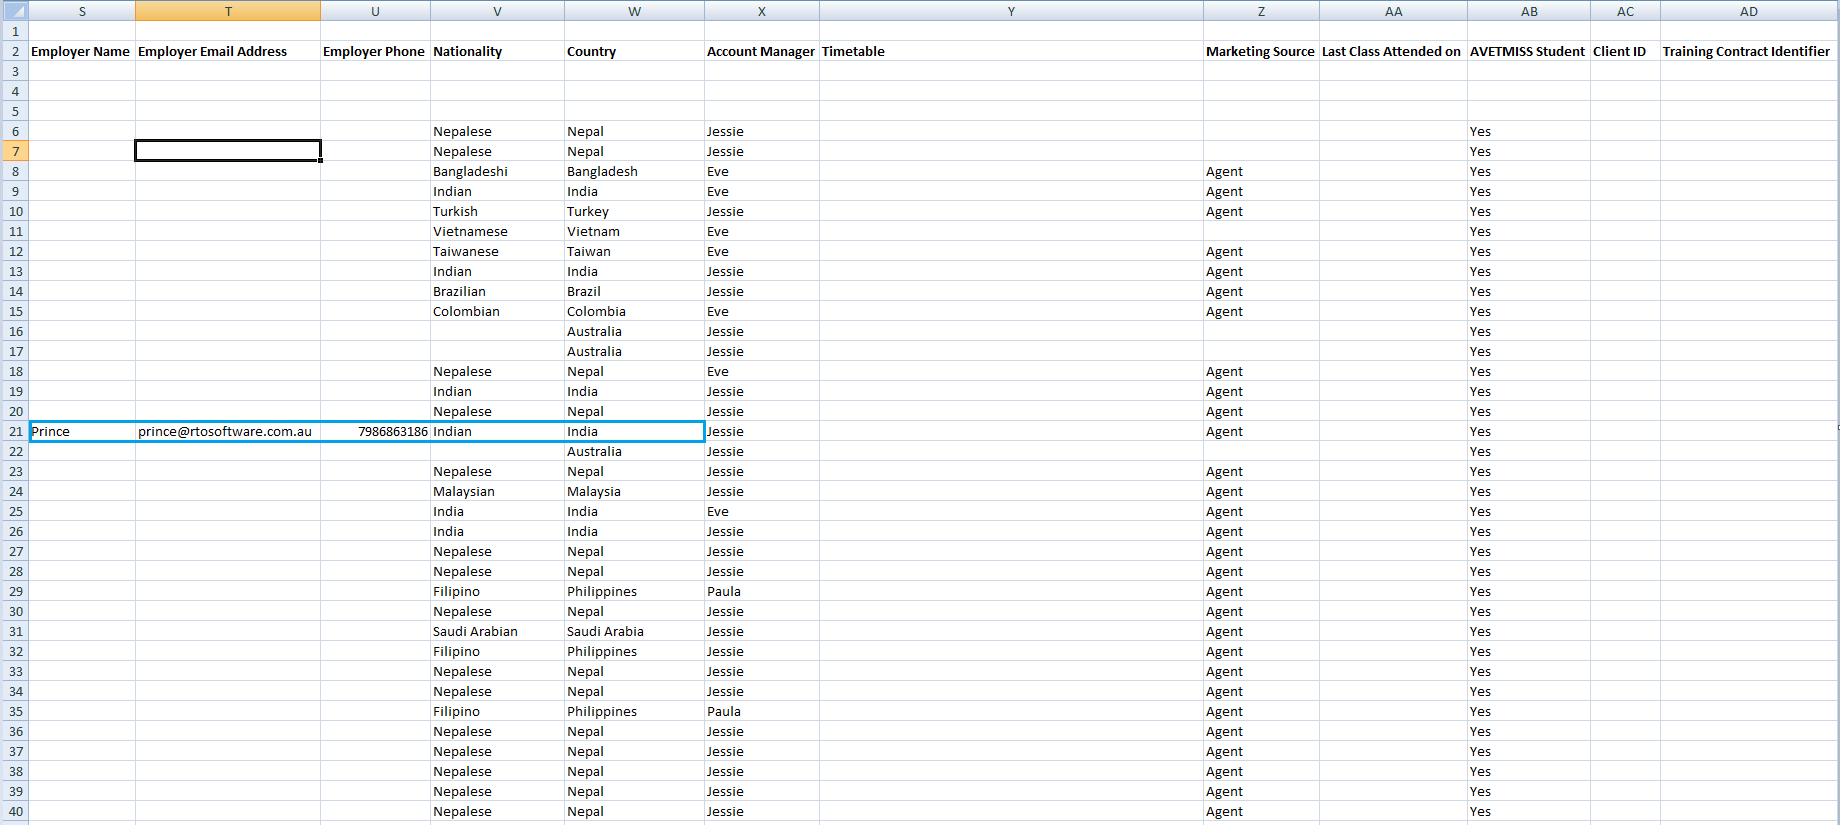
We have introduced a new change for the Employer Column in the Current Student Report. Earlier, the system used to fetch employer details from Student Level but now the system will fetch the employer details from the enrolment level.

Change – Letters and Envelope to Letters and Warnings

Student Dashboard > Current and Upcoming Enrolments Tile > Enrolment Dashboard > Print icon

We have changed the report name from Letters and Envelopes to Letters and Warnings on various dashboards and screens.

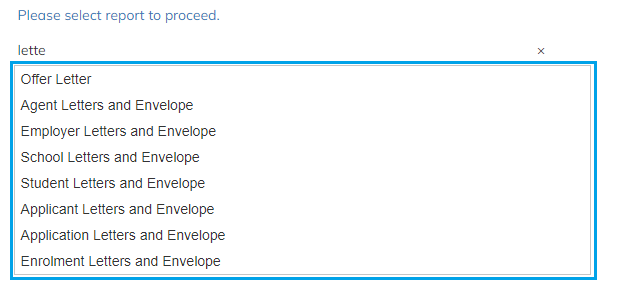
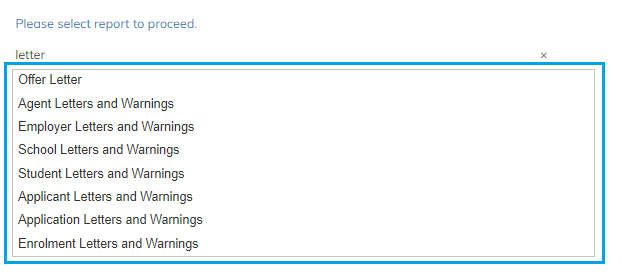
Change on report template screen – Earlier on the Report Template screen, the system used to show letters and envelopes upon selecting the report but now it has started showing the report name as letters and warnings as you can see the old and new report names in the below screenshot.

Old

New

Change on the Student Dashboard – The report name has been changed on Student dashboard under the print icon as highlighted below.

Change on Enrolment Dashboard – The report name has been changed on the Enrolment dashboard under the print icon as highlighted below.

Important Links

Change in display of enrolments on the Student Dashboard

We have introduced a new change in the design of Current/upcoming enrolments and historical enrolments tiles on the student dashboard and also the system is displaying the enrolment’s start date in ascending order in both tiles.

Now you can see full Program name visible for the enrolments in both the tiles as shown below:

Program – Purchasing Contract

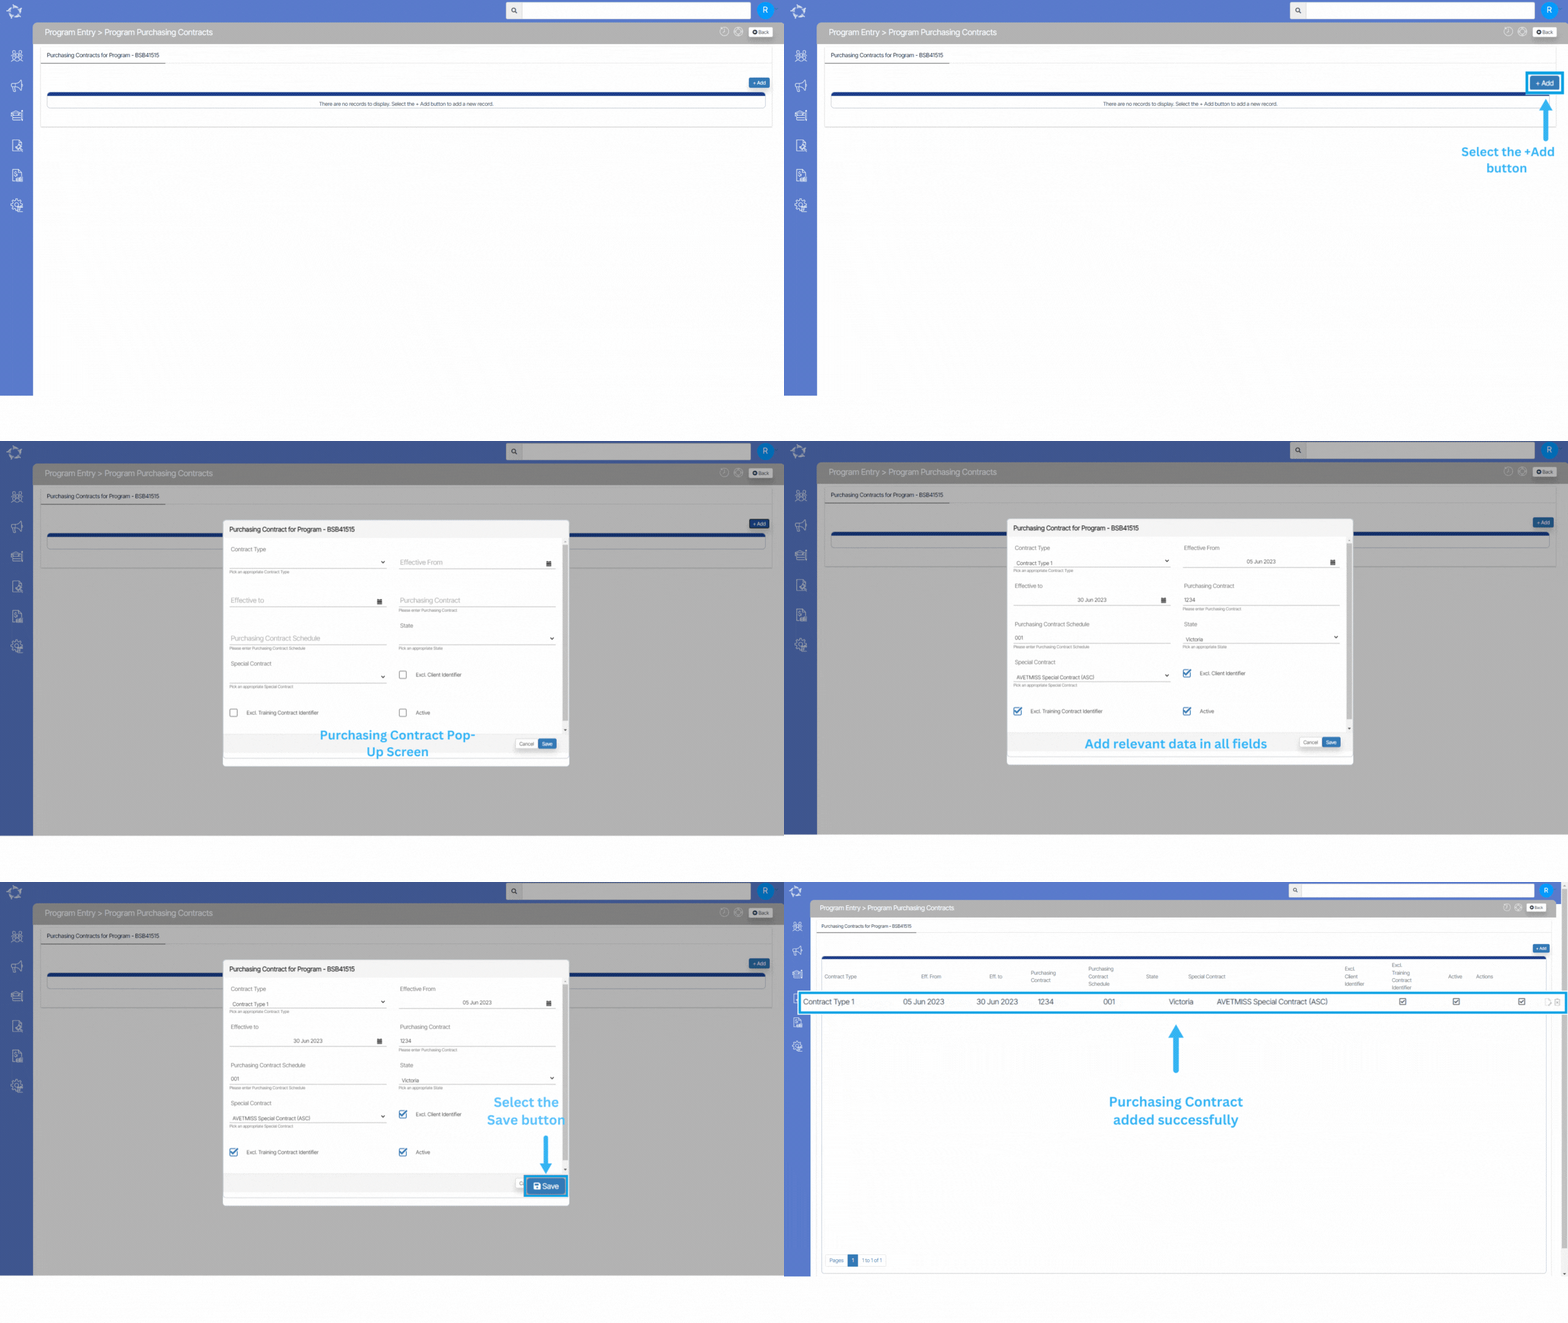
On the purchasing contract screen, you have the option to add the details of the purchasing contract for the program.

When you select the +Add button, a popup window will appear where you can enter the necessary information

Explanation of the fields below:

  • Contract Type – From the dropdown, you can select the contract type.
  • Effective From – From the calendar, you can select the contract starting date.
  • Effective to – From the calendar, you can select the expiry date of the contract.
  • Purchasing Contract – Here you can add the contract number.
  • Purchasing Contract Schedule – Here you can add the contract schedule number.
  • State – From the dropdown, you can select the state.
  • Special Contract – From the dropdown, you can select the special contract type.
  • Excl. Client Identifier – Tick this box if you want to exclude the client identifier from the purchasing contract.
  • Excl. Training Contract Identifier – Tick this box if you want to exclude the training contract identifier from the purchasing contract.
  • Active – Tick this box to make the contract active.

After filling in the required details, click the save button. You will then be able to see the added purchasing contract in the grid below.

Program – AVETMISS

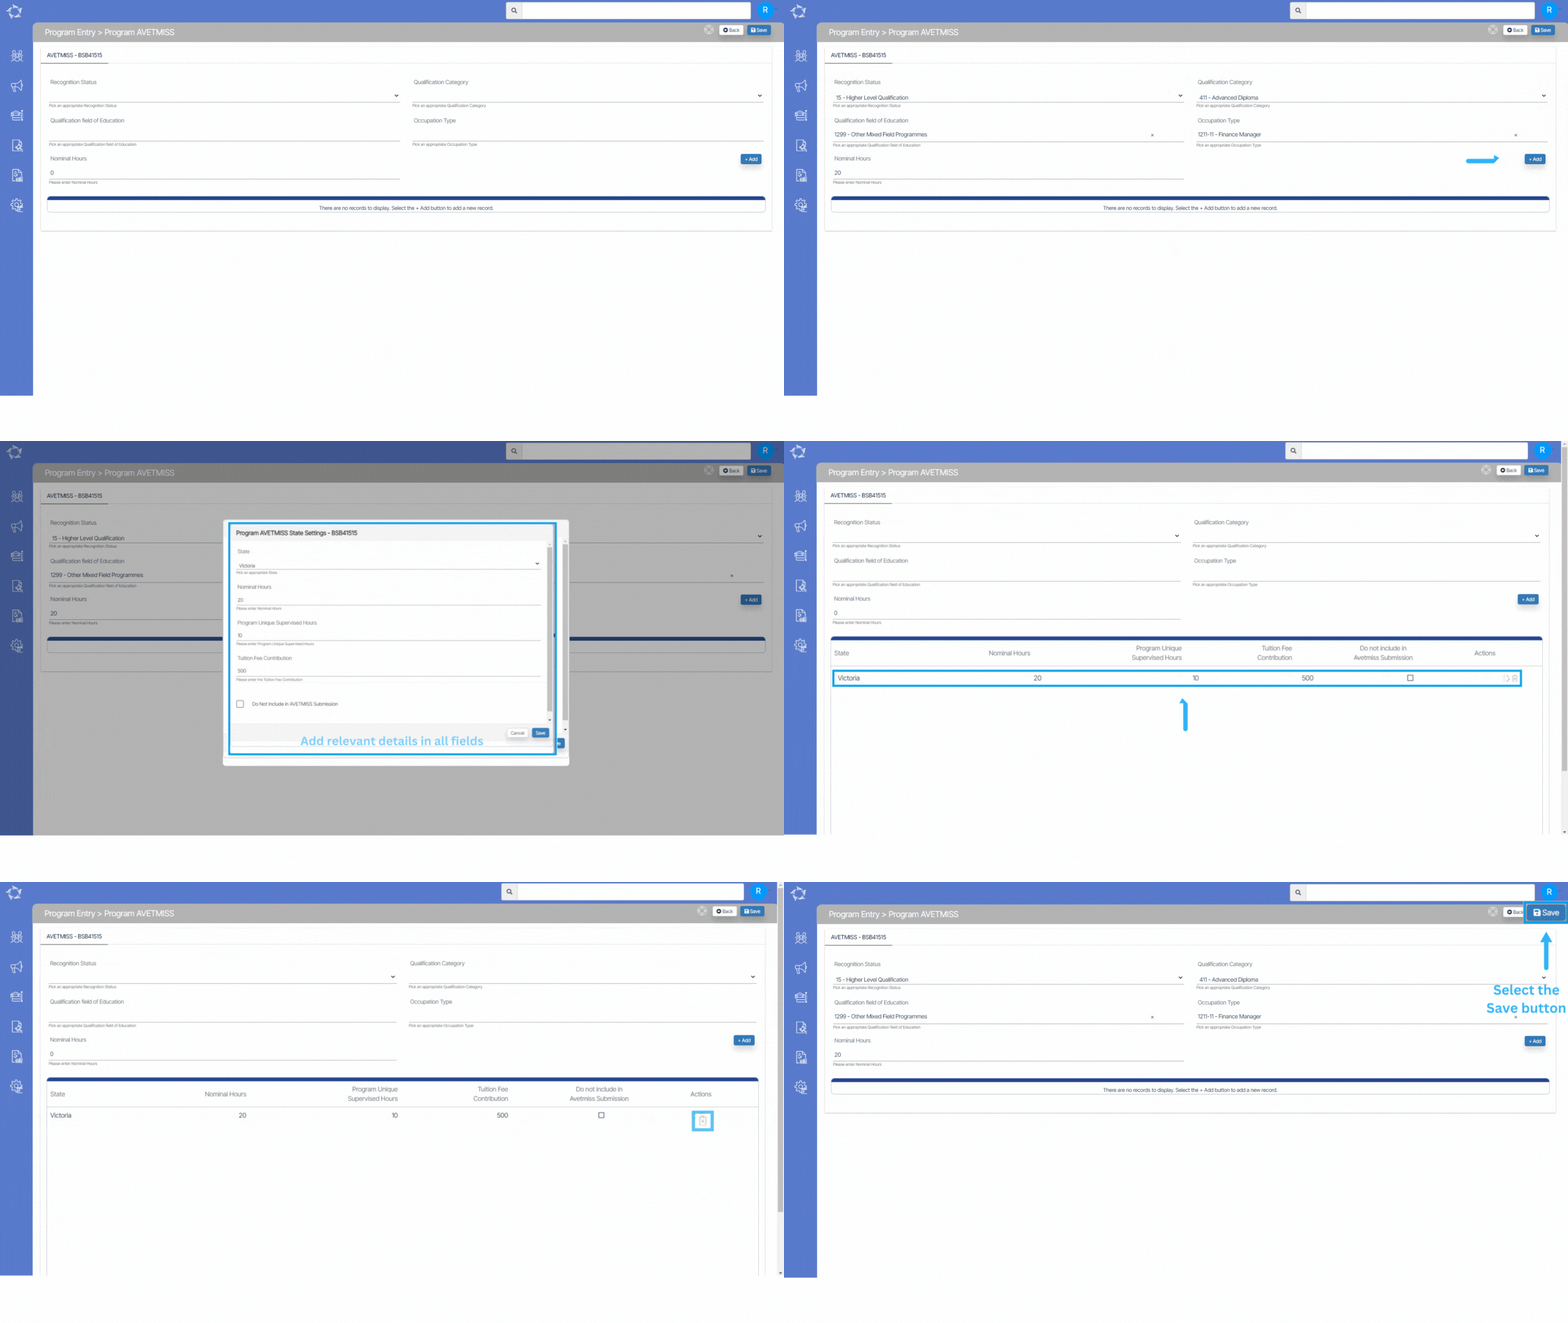
In AVETMISS reporting, Program AVETMISS settings refer to the specific data elements used to describe and report vocational education and training (VET) programs and qualifications. This screen will allow you to update the Avetmiss details for a program as well as Program AVETMISS State Settings.

IMPORTANT – It’s important to note that AVETMISS reporting requirements may be subject to updates and changes. Therefore, it is advisable to consult the official AVETMISS documentation and guidelines provided by the National Centre for Vocational Education Research (NCVER) or the relevant state or territory training authority for the most accurate and up-to-date information regarding AVETMISS settings for student programs in colleges in Australia.

Explanation of the fields below:

  • Recognition Status – From the dropdown menu, you can select the recognition status of the program.
  • Qualification Category – From the dropdown menu, you can select the qualification category of the program.
  • Qualification field of Education – It is a magic search field where you have to put the code of qualification field of education, and you can select the appropriate code from the suggestions.
  • Occupation Type – It is a magic search field where you have to put the code of occupation type, and you can select the appropriate code from the suggestions.
  • Nominal Hours – Here, you have to put the sum of all the nominal hours of the subjects linked with the program.

After that, you can select the +Add button to update the Program AVETMISS State Settings. Once you select the +Add button, the floating window will appear as shown below:

Explanation of the fields below:

  • State – You can select the state from the dropdown.
  • Nominal Hours – Here you have to write the nominal hours.
  • Program Unique Supervised Hours – Here you can add the total number of unique hours of supervised training and assessment activity for the Program.
  • Tuition Fee Contribution – Here you can add the total tuition fee contribution set by the government as per Band 1, Band 2, and Band 3.
  • Do Not Include in AVETMISS submission – Tick this box if you do not want to include this program in AVETMISS submission.

Then hit the save button to save these details.