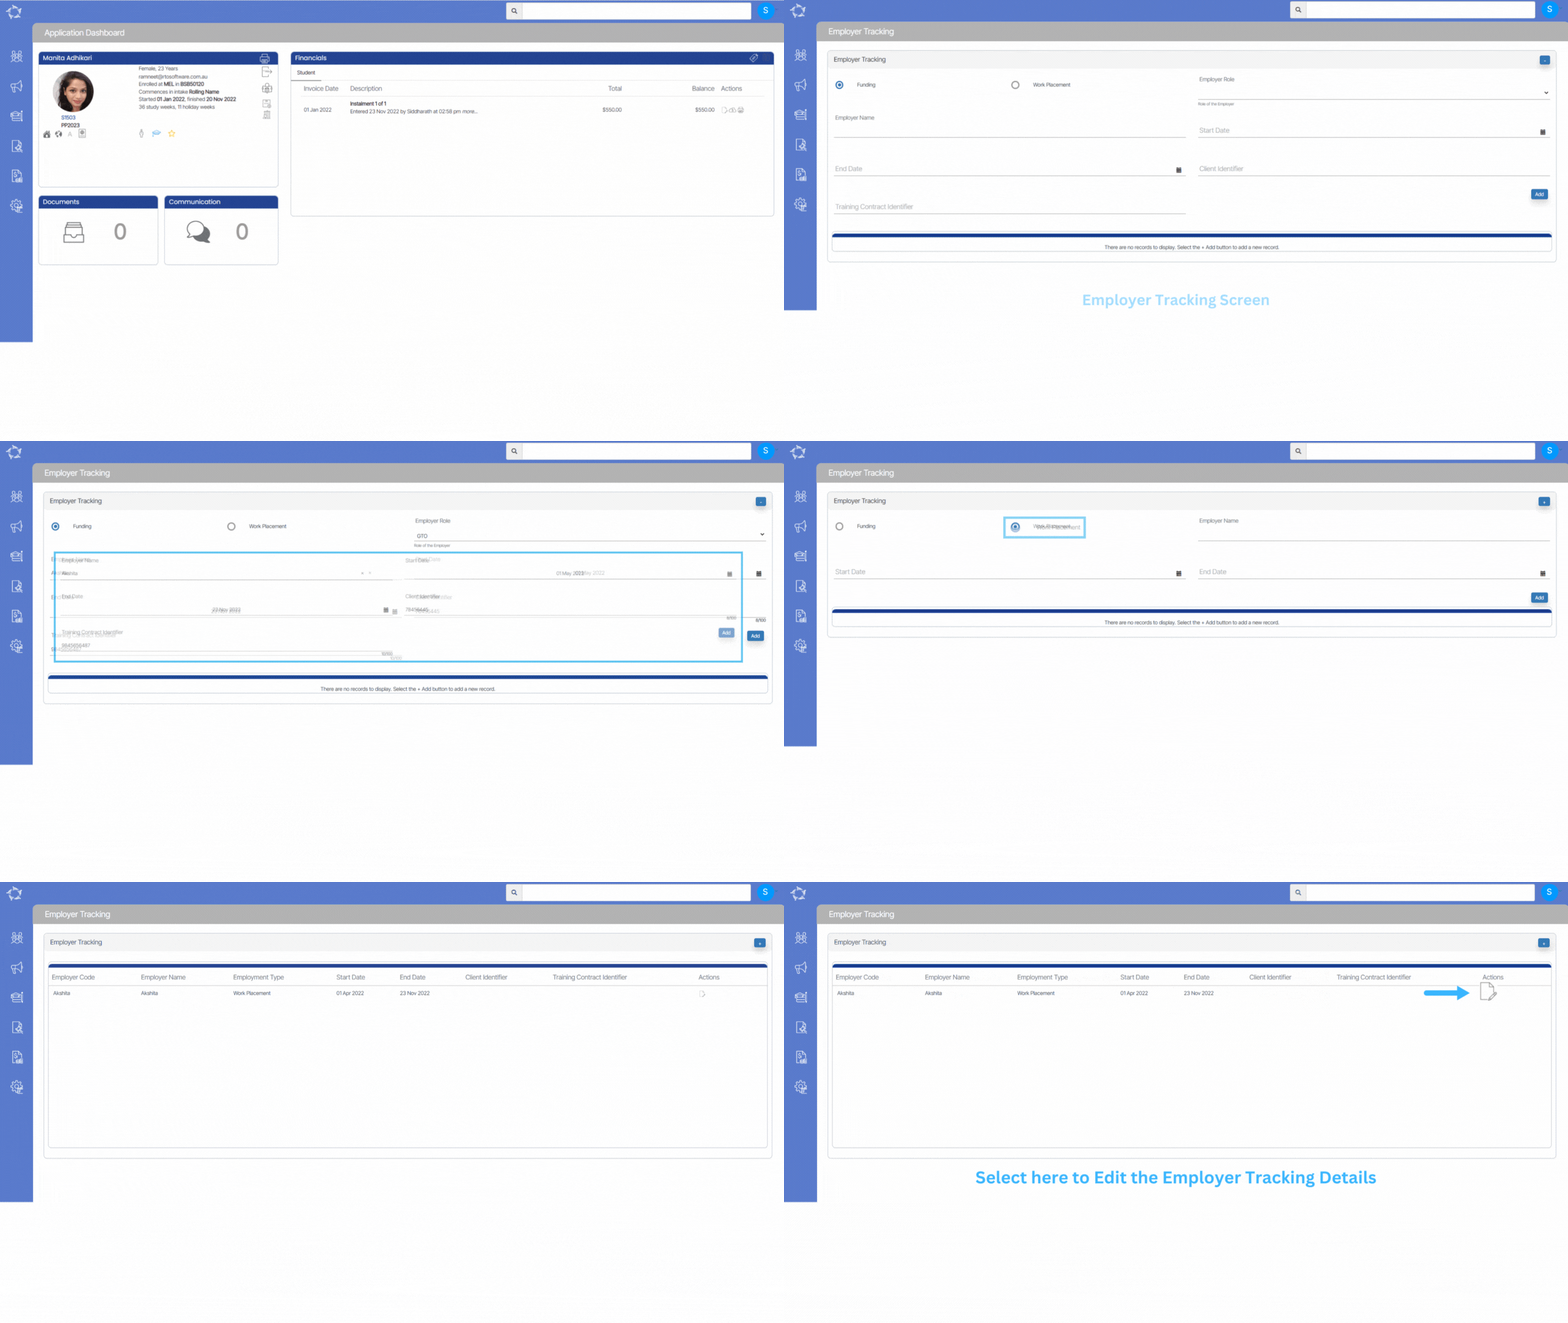
This screen is primarily used by funded clients, specifically for User Choice contracts, to track the employer/s linked to the student’s enrolment. Non-funded clients can also use this screen to add employers for work placements, however, no matter what type of college you are in, you need to set up Employers in the system first. Once you have set up employers, you can then use this screen to add an employer to the enrolment or application.
This screen can be accessed from the Enrolment Dashboard’s profile and Application Dashboard’s Profile section.
Where you are adding an employer for a Funded enrolment:
Explanation of the Fields:
| Field Name | Explanation |
|---|---|
| Employer Role | Select the Employer role under this field. |
| Employer Name | Type in the name or code of the employer under this magic search field. |
| Start Date | Enter the start date of the purchasing contract that your college, employer, and student have. |
| End Date | Enter the end date of the purchasing contract that your college, employer, and student have. |
| Client Identifier | This is typically known as the Delta number from the government’s Delta system for User Choice contracts, however, if it is not a User Choice contract enter any other number, specifically identified as the client identifier, that relates to the specific funded contract linked to the enrolment. |
| Training Contract Identifier | Depending on which State the enrolment is funded in will determine what number you enter here. In QLD this number is the same as the Client Identifier whereas if you are in Victoria, typically there is a different number you enter here. You would need to look at your contract and the State specific requirements to see what number you should enter here. |
Employer Role – you will see three options to select as follows:
- GTO – only select this if the Employer is the GTO which means the system will also consider this employer as the Legal employer as well.
Note: You will not be able to add another employer to the enrolment with an employer role of Legal when you select this employer role. - Host – typically this option would only be used where you have a GTO Employer linked to the enrolment. The GTO employer contracts the student out to a ‘host’ employer and you need to add the information for that employer to the enrolment.
- Legal – if the employer is not a GTO, then you would enter an employer with an employer role of Legal.
IMPORTANT: for your funded enrolments, where you have an employer linked with the purchasing contract information, the system will only ever use the employer role of GTO or Legal to export information in the NAT files for the enrolment. The Host employer role will be ignored for AVETMISS purposes.
Note: where a student leaves an employer (legal or GTO) then you may need to change the end date against the enrolment. If you will be adding a new employer, then you must change the end date of the first employer to the last date they were contracted to the employer, before entering a new employer against the enrolment. You cannot have overlapping start and/or end dates for each employer in this scenario.
Where you are adding an employer for Work Placement:
Explanation of the Fields:
| Field Name | Explanation |
|---|---|
| Employer Name | Type in the name or code of the employer and select it. |
| Start Date | Update the start date for the work placement with the employer. |
| End Date | Update the end date for the work placement with the employer. |
IMPORTANT: There is no save button for this screen as it will autosave when you select the Add button.

If you have any queries, please do not hesitate to contact us on 1300 85 05 85 or email us on support@rtosoftware.com.au


