Overview
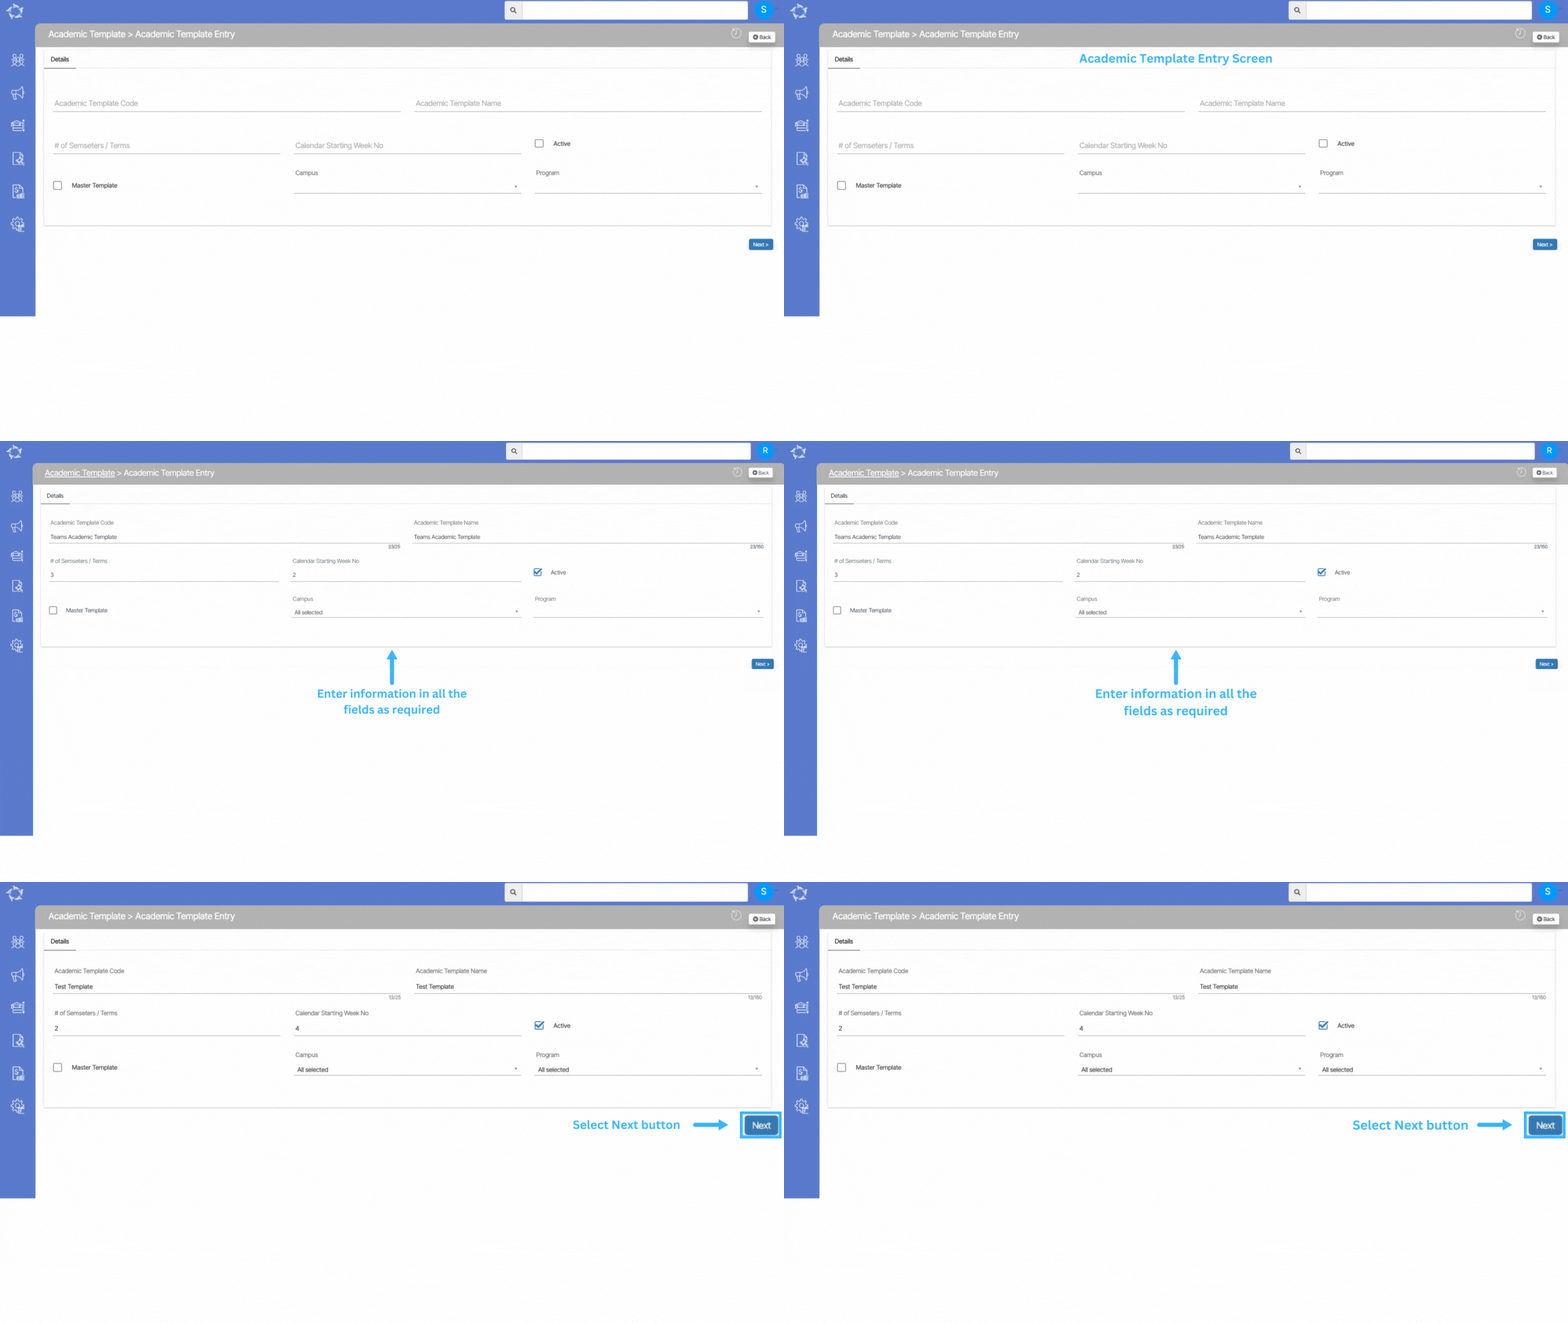
When you select the +Academic Template button on the Academic Template Welcome screen, the system will redirect you to the Academic Template Entry screen. This is where you will initiate the process of creating a new academic template within the system.
Note – Any changes made on this screen will not be saved unless you proceed to the next step and completes all the necessary actions in the academic template.

Explanation of the fields below:
| Fields | Explanations |
|---|---|
| Academic Template Code | Depending upon your requirements type the academic template code in the field |
| Academic Template Name | Depending upon your requirements type the academic template name in the field |
| # of Semesters/Terms | Write the total number of semesters/terms. For example 2 or 4 |
| Calendar starting week no | Write the calendar starting week number in this field |
| Active | Select this tick box to activate the academic template |
| Campus | If you have multiple campus and wanted to apply this template to all of your campuses then you can select them by selecting the tick boxes. |
| Program | If you wish to apply multiple programs to the template then you can select them from the dropdown |
Once all the above fields are selected and updated then you need to select the next button to complete the further actions. To know more select the next arrow button below.
If you have any queries, please do not hesitate to contact us on 1300 85 05 85 or email us on support@rtosoftware.com.au


