Applicant Dashboard > Applications Tile > Burger Menu
This screen allows you to modify the intake date for an applicant’s application at the applicant level when the application is not converted. This can be helpful in cases where the student needs to defer their application due to a visa delay or personal reasons. To simplify the process and save time, you can now modify the intake dates for multiple applications of the same applicant at once.
Note: When using this screen, ensure that all necessary changes to application dates are made before converting the application. If changes need to be made after the application is converted then you can make the changes from the Student Dashboard – Edit Enrolment/s Dates screen.
The below steps will explain to you how you can change the intake date:
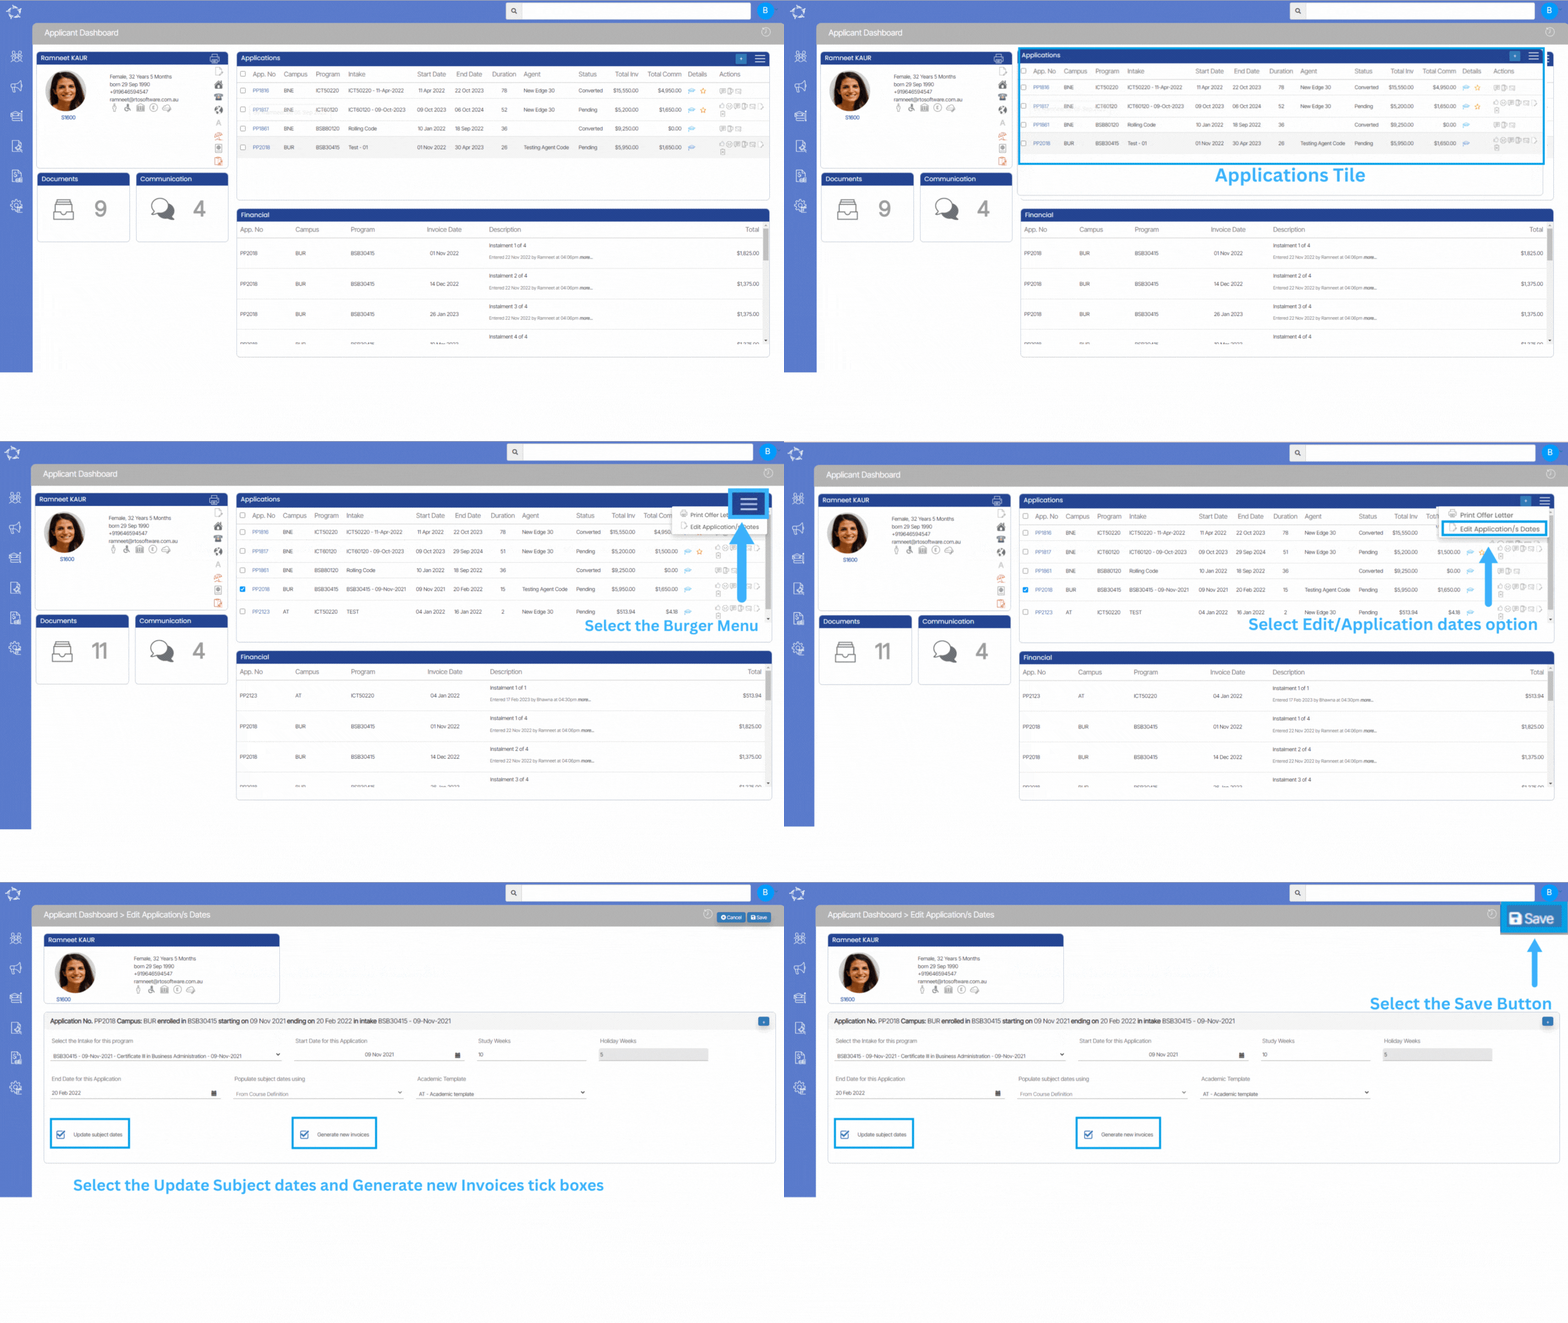
- To utilise this option, you need to select the specific application number for which you want to modify the intake dates.
- Select the Burger menu icon on the Applications Tile where you manage the applicant’s application information. The Burger menu icon typically looks like three horizontal lines stacked on top of each other.
- Look for the option titled “Edit Application/s Dates” and select.
- The screen will then take you to the Edit Application/s Dates screen where you can modify the intake dates for one or more applications.
- By default, the system will show the section for 1st application and you can expand other application sections by selecting the expand (+) button.
- To enrol the applicant in a new intake, you must select the desired intake from a dropdown menu. Once an intake is selected, the system will automatically populate other fields such as the start date, study weeks, holiday weeks, and end date.
IMPORTANT – When changing the intake for an application, it may be necessary to update various dates associated with that application, including invoice dates, invoice due dates, and subject dates.
To make this process easier and more efficient, the system appears to have a checkbox labeled “Update subject dates and Generate New Invoices“. By selecting this checkbox, the system will automatically update the relevant dates and new invoices associated with the application to match the new intake. It is recommended that users always check this box to avoid the need for manual updates on a case-by-case basis.
Once all the above steps are done, select the save button, and the system should update the application dates as per the changes you have made. It is recommended that you double-check all dates and information to ensure that everything is correct before proceeding.

If you have any queries, please do not hesitate to contact us on 1300 85 05 85 or email us on support@rtosoftware.com.au
