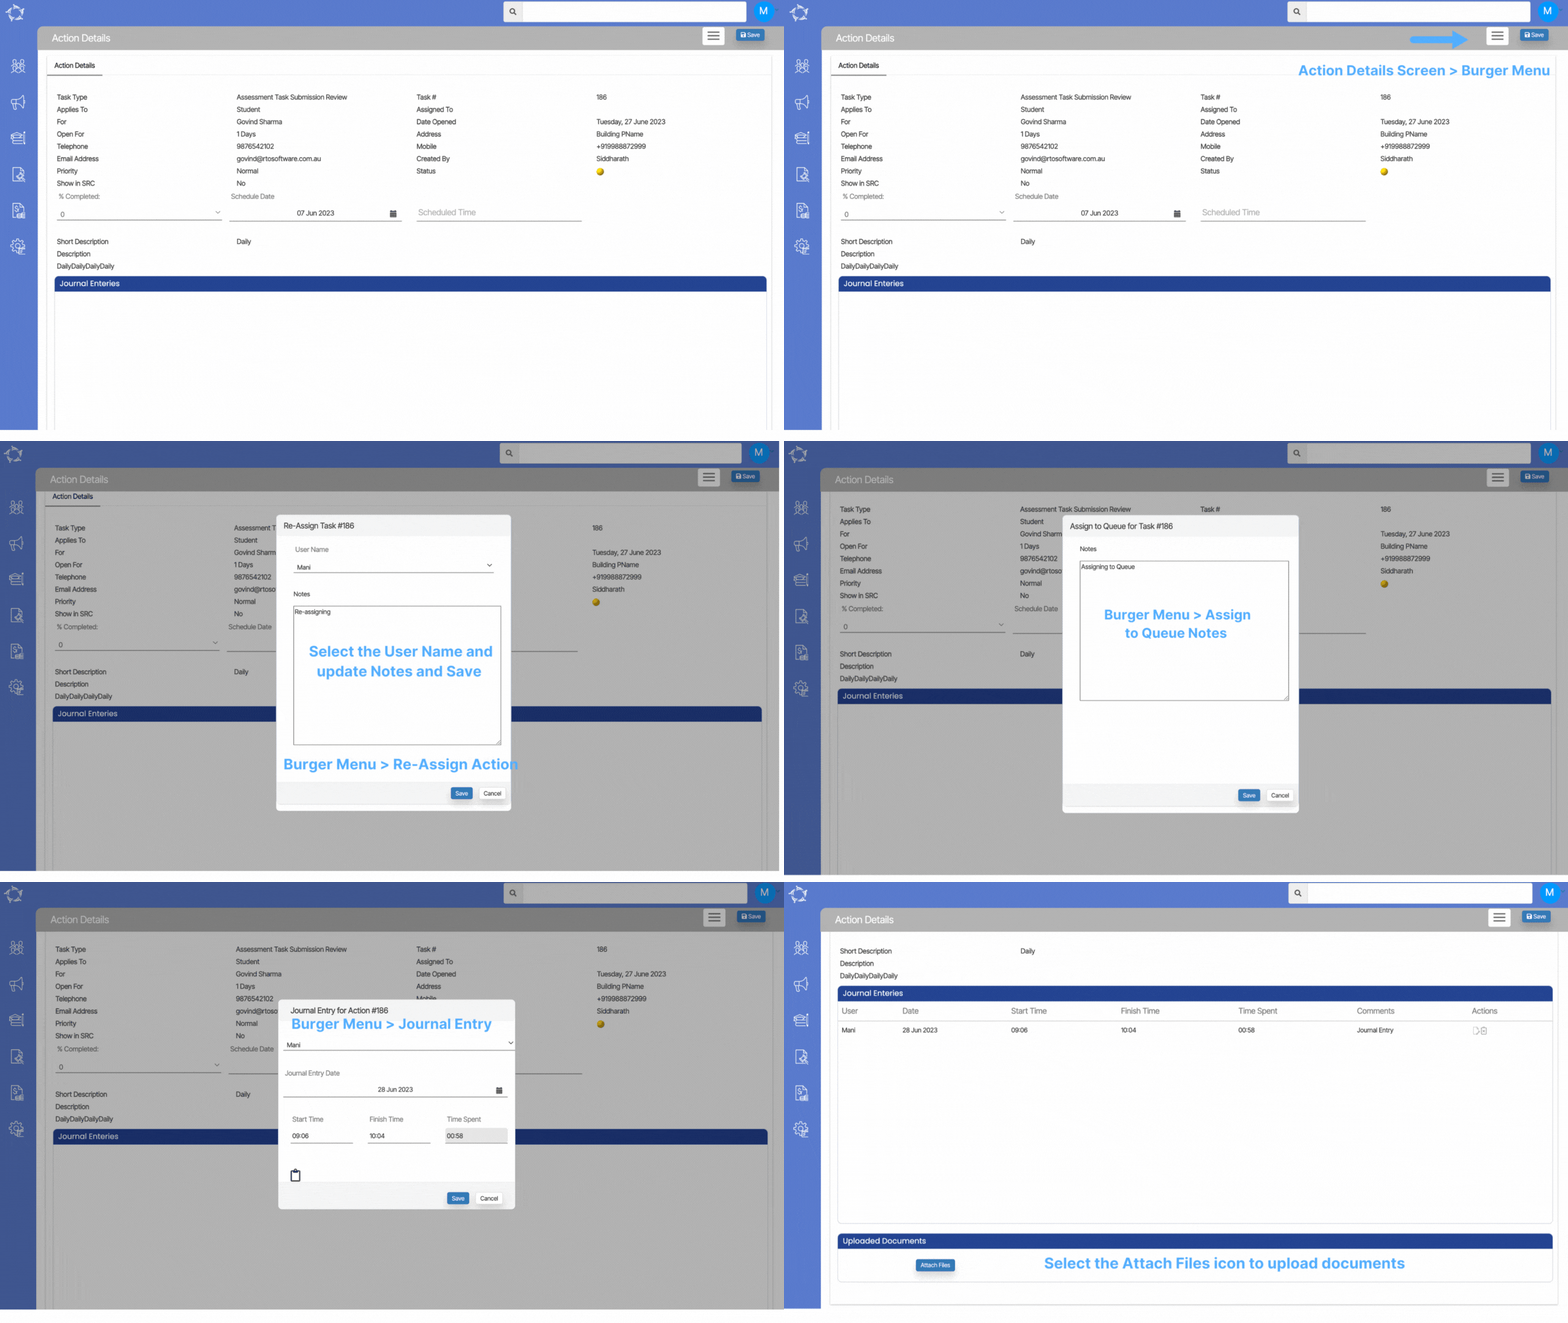
Tasks Details > Action Information > Preview Icon > Action Details Screen

When you select the Preview Icon within the Action Information pop-up on the Task Details screen, you will be directed to the Actions Details Screen. This screen provides a comprehensive view of all the details associated with the task created from the Task Entry Screen. Additionally, you have the option to attach documents to the task directly from this screen, facilitating efficient documentation and reference.
Furthermore, you will notice a Burger Menu icon positioned on the right-hand side of the screen. This menu offers various options to manage the task effectively. Within this menu, you can choose to re-assign the action to a different person, edit the action details if necessary, mark the action as complete to indicate its fulfilment, assign the action to a queue for further processing, or cancel the action if it is no longer needed. The flexibility provided by this menu empowers users to make necessary adjustments and updates to the task based on changing requirements. In addition, through the burger menu, you can also add a Journal Entry, which allows you to include any relevant information or notes pertaining to the task.
Overall, the Actions Details Screen, accompanied by the Burger Menu functionality, offers a comprehensive platform for managing tasks efficiently. You can access task specific information, attach documents, and utilise the menu options to make necessary updates, track progress, and maintain accurate records of their actions.
How do the Burger Menu options work?
- Re-Assign Action – When you select this option from the Burger Menu, a pop-up window will appear, allowing you to re-assign the action to a different person.
- Edit Action – Upon selecting the edit action, the system will take you to the Action Entry/Task Entry Screen where you can make the necessary changes to the task.
- Mark Complete – When you choose this option, a pop-up message will appear at the top of the screen, prompting you to select OK to complete the task or Cancel to leave it as it is.
- Assign to Queue – Selecting this option triggers a pop-up message with Yes and No options. You can indicate whether you want to assign the action to a queue or not. If you select Yes, the system will display another pop-up window where you can add notes related to the action and save them.
- Cancel – Upon selecting this option, a message will appear at the top of the screen asking, Do you want to cancel the Action? You can choose Yes or No based on your preference.
- Journal Entry – When you choose this option, a pop-up window will appear. Within this window, you can update the Journal entry date, and start and finish time (the system will calculate the total time and update it in the “Time Spent” field). If you wish to add any notes, you can do so by selecting the Notes Icon and saving them. After saving the Journal Entry, the screen will refresh, and the journal entry will appear in the Journal Entries Grid on the Action Details screen. You will have the flexibility to edit and delete the Journal Entry from the grid using the edit and delete icons available in the Actions column.

If you have any queries, please do not hesitate to contact us on 1300 85 05 85 or email us on support@rtosoftware.com.au
