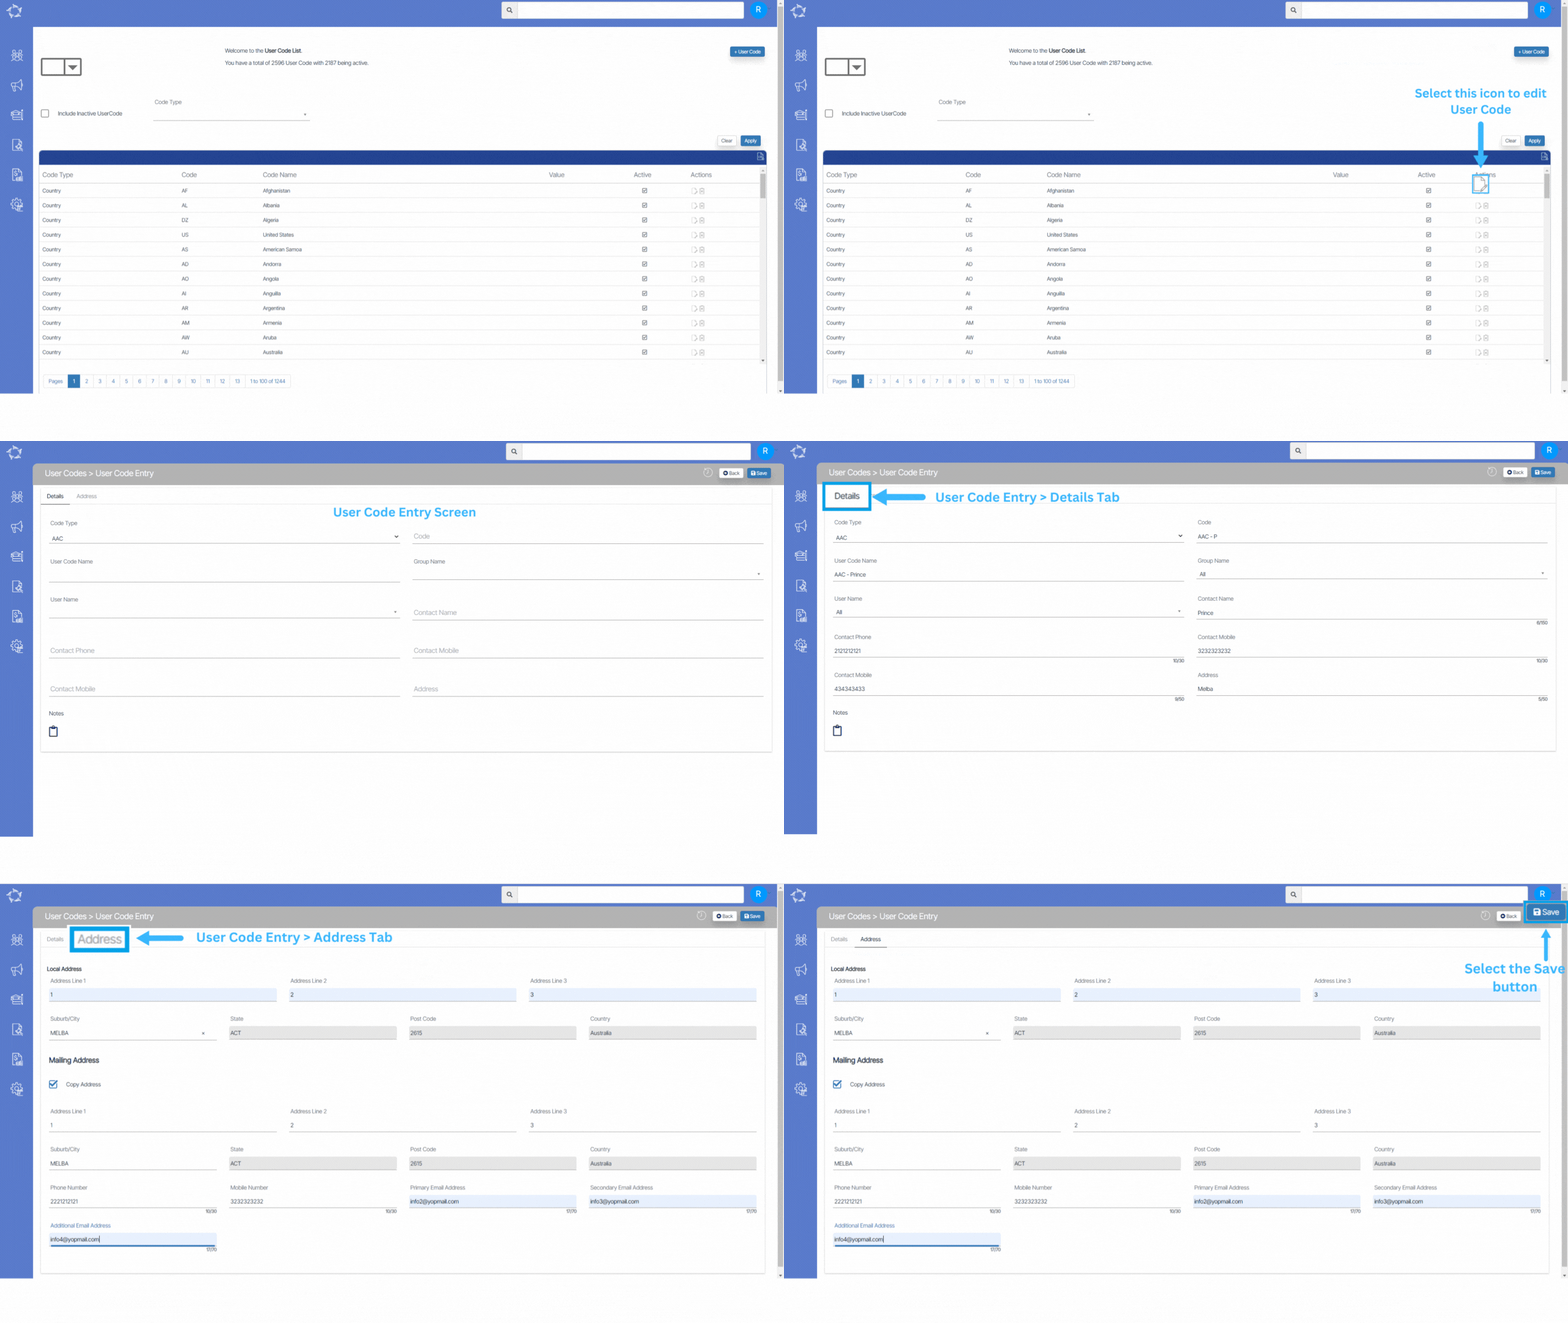
User Codes > +User Code Button > User Code Entry Screen
Before attempting to create or modify a User Code, it is essential to identify the field’s name where the dropdown is located. For example, the field could be named Marketing Source. This step is crucial as it allows us to determine if the field is available on the current screen for customising the dropdown options. Once we have obtained the field’s name, we can proceed to the User Code screen to carry out the necessary actions.
How to Create User Codes
Step 1 – Select the + User Code button on the User Code Welcome screen and the system will open the User Code entry screen.
Step 2 – Code Type – Select the option from the dropdown for the Code Type field and this is where you need to select the name of the field you want to add in the dropdown as Marketing Source.
Step 3 – Code – This is usually an abbreviation of the User Code Name field, for example, the User Code Name that you want to see in the dropdown for Marketing Source could be Website, so the code could be entered as www.
Note – the code that you enter does not show anywhere else in the system, it only shows on this screen and the initial User Code List screen.
Step 4 – User Code Name – this is the entry that will display in the dropdown, such as Website.
Step 5 – Group Name & User Name – select the option as All in these fields.
Step 6 – Fields like Contact Name, Contact Phone, Contact Mobile and Address are self explanatory fields and you can fill them accordingly.
Step 7 – Once all the above fields have information entered then select the Save button at the top of the screen. Once you have saved the new entry, you can navigate back to your original screen and you would need to refresh it (if you already have it open) and you will see your new user code displaying in the dropdown.

If you have any queries, please do not hesitate to contact us on 1300 85 05 85 or email us on support@rtosoftware.com.au
