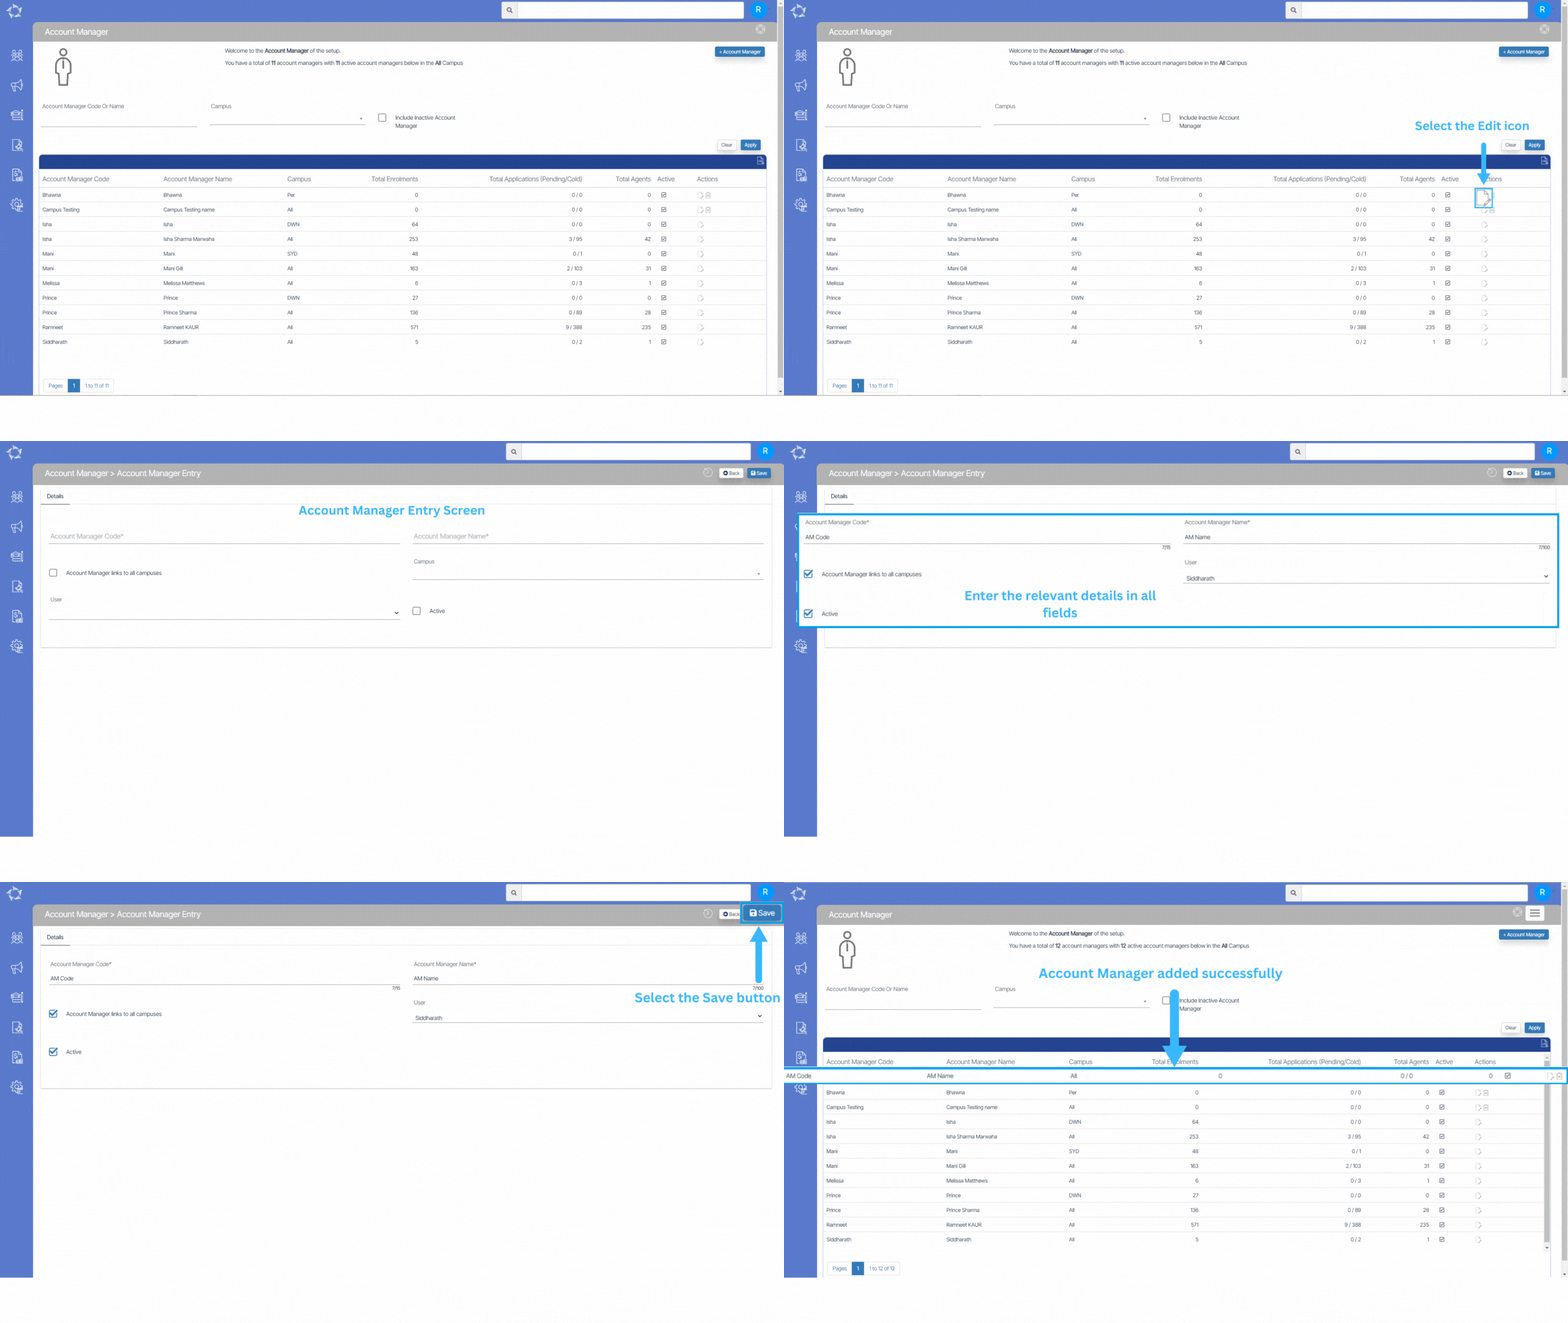
Main Dashboard > System Admin menu > Account Manager
To create a new account manager, select the +Account Manager button from the Account Manager Welcome screen. This will take you to the Account Manager Entry Screen, where you will be able to input or modify the relevant information associated with the account. You will need to select the appropriate account manager code and name, along with other required details that need to be filled in. It is crucial to enter the correct account manager code and name to avoid any confusion in the future.
After filling in the details of the Account Manager, select the “Save” button to save the changes.

Below is the Explanation of the fields.
| Field Name | Explanation |
|---|---|
| Account Manager Code | This field cannot be left blank as it is mandatory |
| Account Manager Name | This field cannot be left blank as it is mandatory |
| Account Manager link to all Campuses | Tick this option to select this Account Manager for all campuses |
| Campus | You can select a specific Campus for the Account Manager here |
| User | Select the User from the dropdown list. |
| Active | Tick this box to make the Account Manager active. |
If you have any queries, please do not hesitate to contact us on 1300 85 05 85 or email us on support@rtosoftware.com.au
