Main Dashboard > Student Management > Class Allocation
IMPORTANT – We believe that staying informed about the latest developments in our software is vital for optimising your experience and maximising the benefits of using our system. To view the latest updates and modifications on the Bulk Class Allocation Step 2, we kindly request you to navigate to the History icon  showing on the Bulk Class Allocation Step 1. By selecting this icon, you will gain access to a detailed log of all the recent changes made to the software.
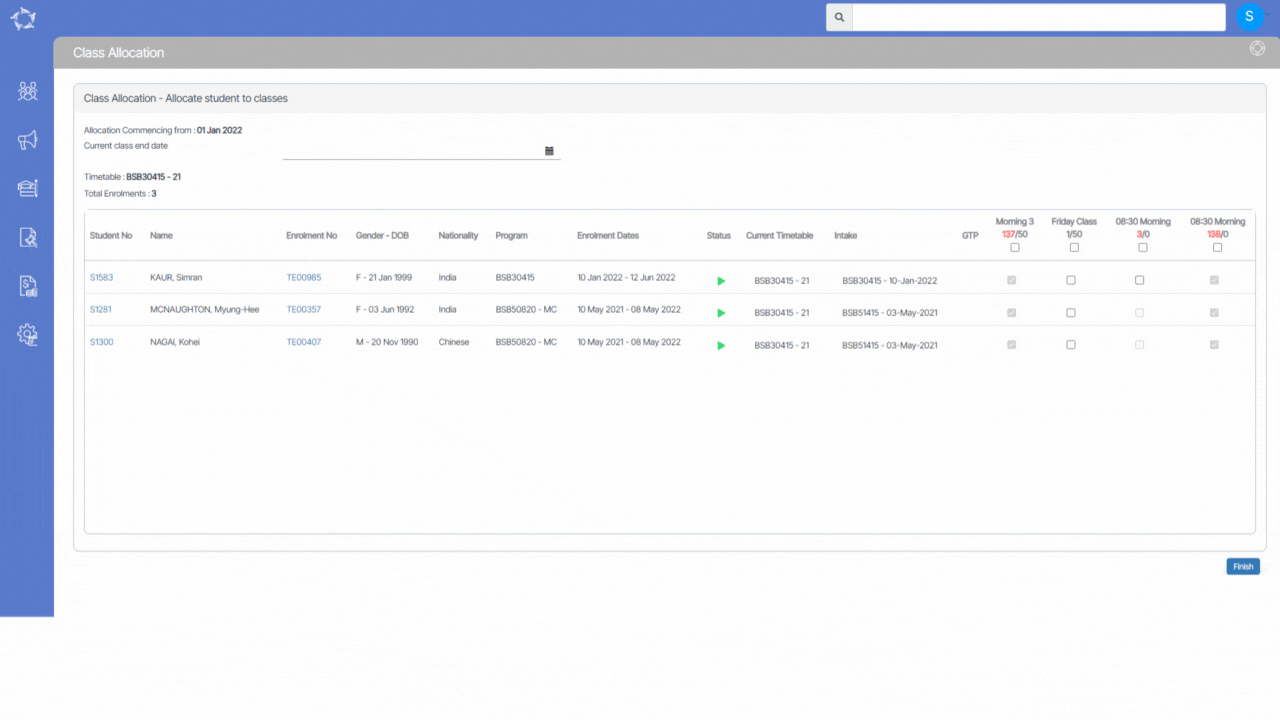
The Bulk Class Allocation Step 2 screen is where you can see all the student’s enrolments and the classes that are linked to the timetable you picked in the Bulk Class Allocation Step 1. This screen will show you all the information you need to allocate the students to their classes.
Allocating classes to a student is an easy task. All you need to do is locate the checkbox located under the ‘Classes’ column that matches the name of the student you want to allocate the classes. Simply select the checkbox to allocate the classes to that particular student.
Note: If you find that you are unable to select a tickbox, the system will provide you with a tooltip explaining why you are unable to do so. One possible reason could be that the subjects are linked to the classes but not the enrolments. The tooltip will help you understand the issue and guide you on how to resolve it, so you can allocate classes to the student successfully.
IMPORTANT – If you are using this screen to move students from one timetable or class to another, you will need to pay attention to the date field. This field allows you to specify the date when you want the student to start attending the new class or timetable. Ensure that you enter the correct date to avoid any confusion or errors in the student’s schedule. This will ensure that the student’s enrolment details are updated accurately and in a timely manner.
Before selecting the Finish button, it’s a good idea to double-check all the information you have entered to avoid any errors. Once you have completed all the necessary steps, you can allocate the enrolments to the classes by selecting the Finish button. This will finalise the allocation process and ensure that the students are correctly assigned to their respective classes.
If you have any queries, please do not hesitate to contact us on 1300 85 05 85 or email us on support@rtosoftware.com.au