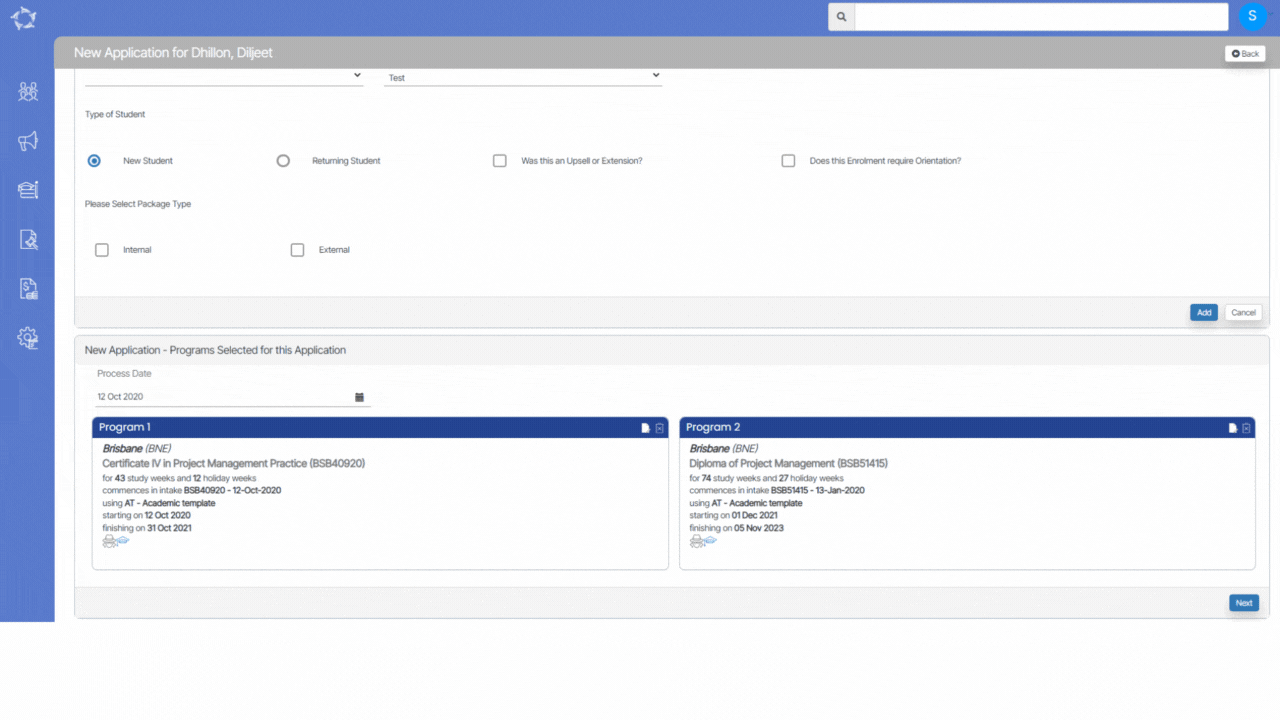
This screen allows you to choose the programs for the application and you can select multiple programs for the application as shown below:
Note – DO NOT close your browser while you are walking through the steps of this process, as you will lose what you have entered. When you select the NEXT button in each step of this process the system does not save what you have done to the database. It allows you to go back in the process to change what you have selected, however, it is not until the final step where you select the FINISH button that the system will fully save everything to the database for you.
When you select the Add button it will show you the total number of Programs in the New Application – Programs selected for the application grid. The tiles will show you basic information about the program. If you wish to make the changes in the selected programs then you can select the edit icon from the program tile or you can delete the program by selecting the delete icon.
Once you are happy with what you have selected for the application, you then need to select the Next button for further actions to complete the application.
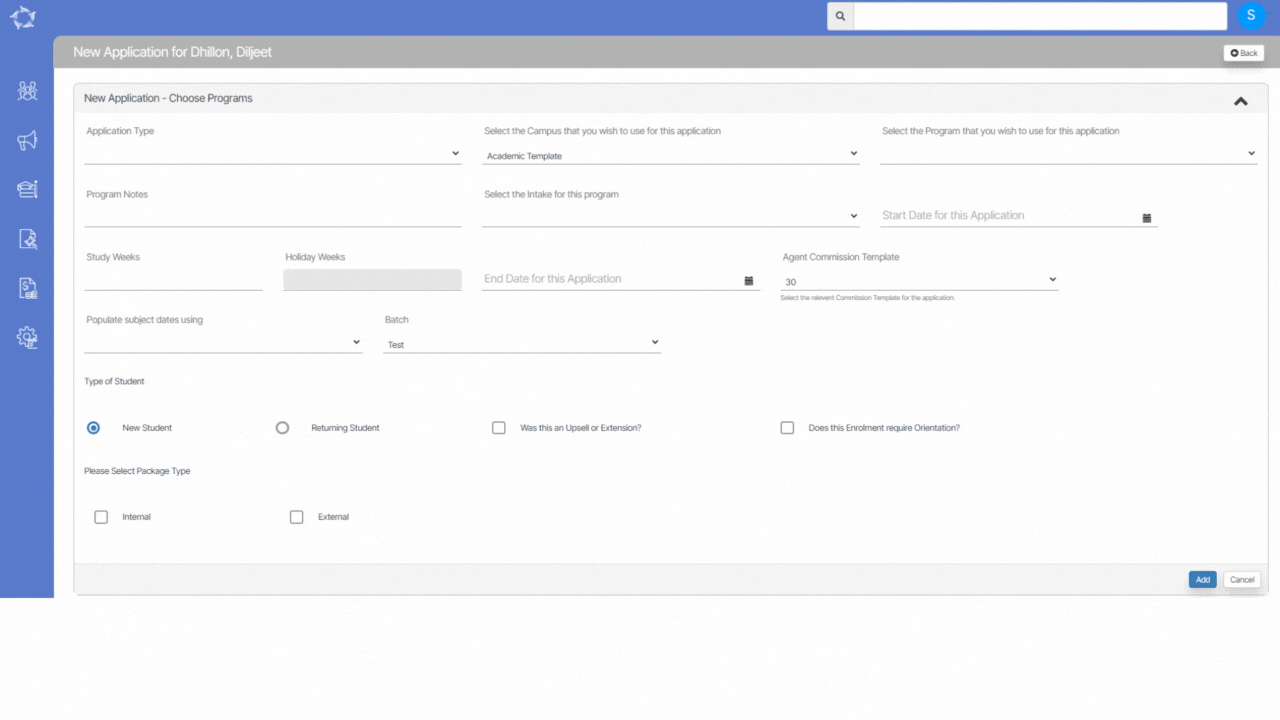
Explanation of Fields :
| Fields | Explanation |
|---|---|
| Application Types | This is a user code and you can create any application type as you required. |
| Select the Campus that you wish to use for this application | If you have multiple campuses then this dropdown will show you all the campuses where you can select a specific campus for the application. |
| Select the Program that you wish to use for this application | It will show you the list of Programs linked to the campus selected. |
| Program Notes | You can add the Program notes |
| Select the Intakes for this program | This will show you the intakes that are linked to the program. |
| Start Date for this Application | If you have selected the intake then the system will populate the start date for the application and if you are using the rolling intake then you select the date from the calendar icon for your rolling intake. |
| Study Weeks | This will show the total study weeks of the application. |
| Holiday Weeks | Total holiday weeks. |
| End Date for this Application | The system will populate the end date for the application when the Program and Intake get selected. |
| Agent Commission Template | This will show you the agent’s commission for the selected agent in the first step of the application. |
| Populate subject dates using | This dropdown will show you the fields that how you want to show the subject dates for this application. |
| Batch | |
| Type of student | New Student or Returning Student |
| Was this an Upsell or Extension? | Select the tick box |
| Does this Enrolment require Orientation? | Once you select the tick box, it will show you induction/Orientation field to select the date. |
| Please Select Package Type | Internal or External |


If you have any queries, please do not hesitate to contact us on 1300 85 05 85 or email us on support@rtosoftware.com.au