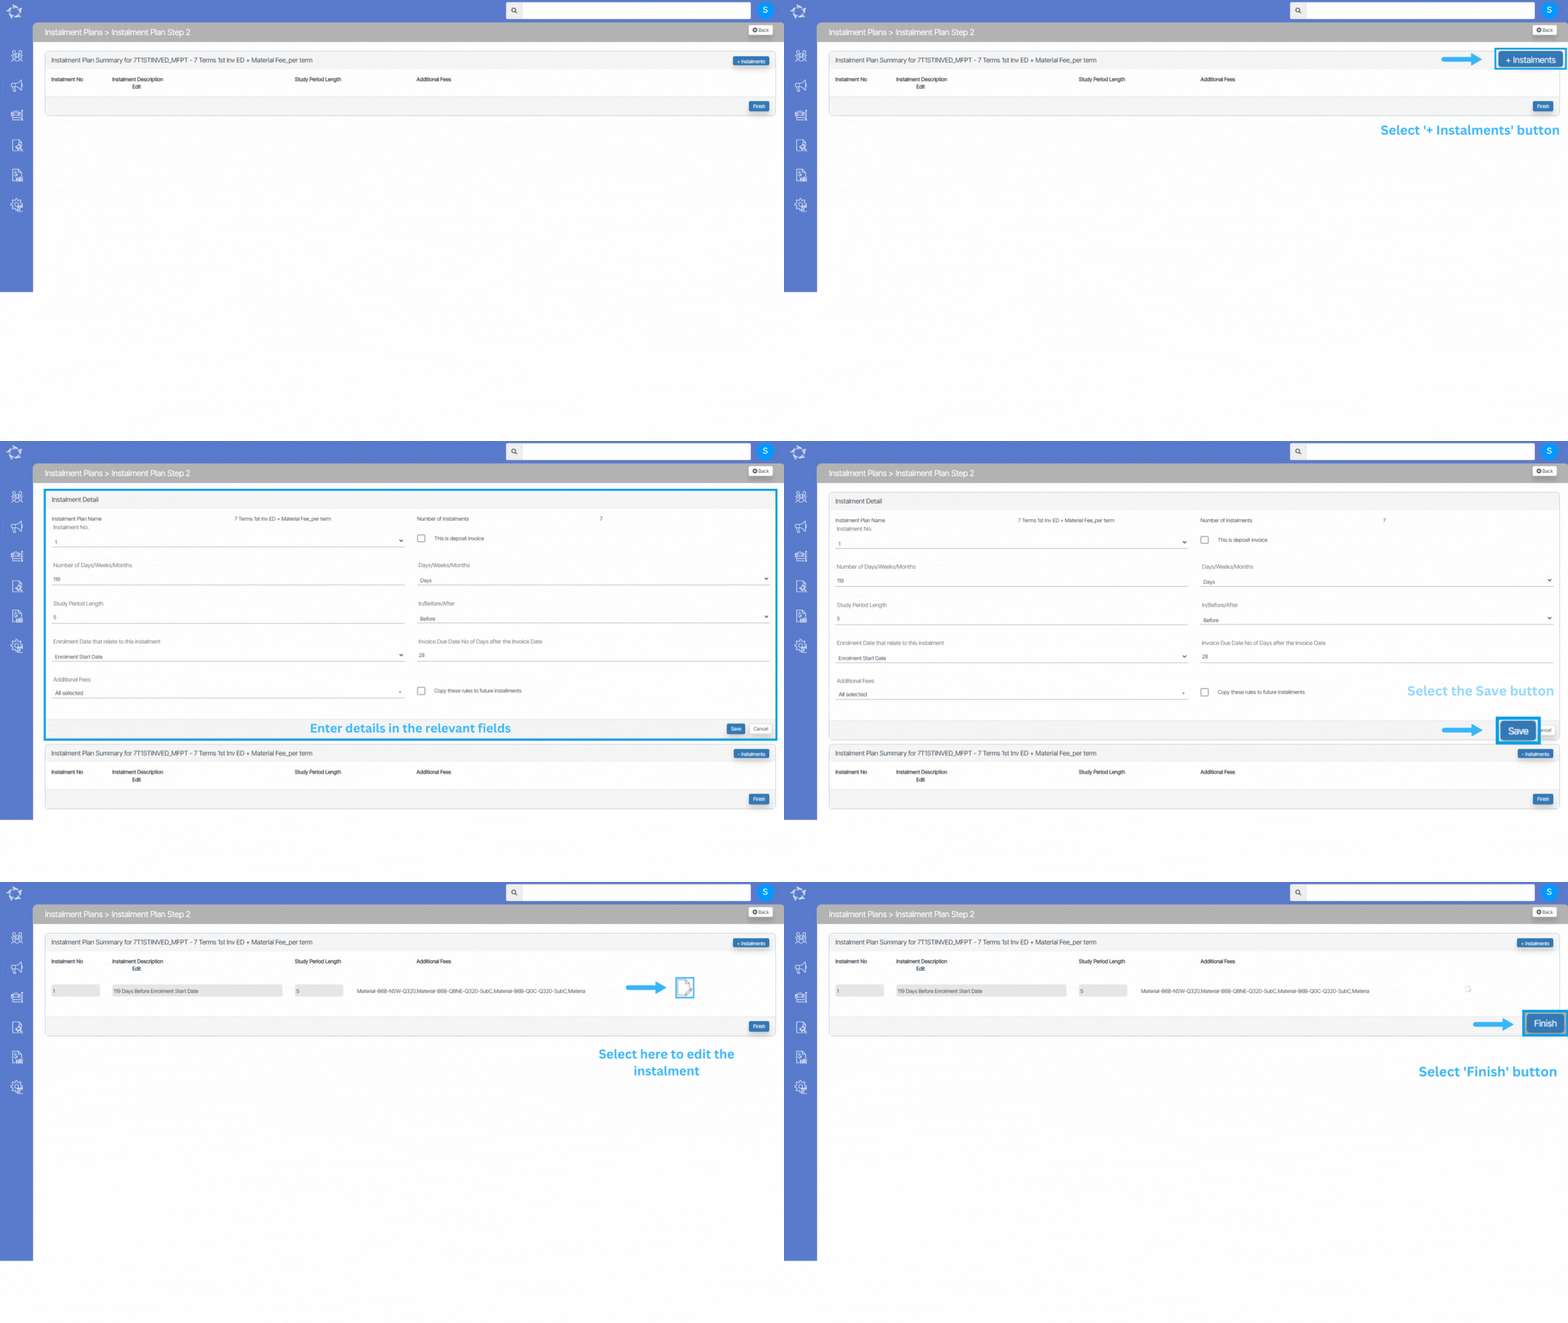
Instalment Plans > + Instalment Plan button
Follow the below steps to add the Instalments to the Instalment Plan:
- Select the + Instalments button to add the new Instalment Plan to the system.
- Once the +Instalments button is selected, it will display the Instalment detail screen where you will see different fields.
- Enter details in the relevant fields and select the Save button.
- You will see the instalment plan in the grid, you can edit your instalment plan as well.
- Select Finish to finish to create the instalment plan

Below is the Explanation of the fields:
| Fields | Explanation |
|---|---|
| Instalment No. | Select instalment no. from dropdown list. |
| This is Deposit Invoice | Select this tick box if it is a deposit invoice. |
| Number of Days/Weeks/Months | You can add a number of days/weeks/months. |
| Days/Weeks/Months | You can select days weeks or months from dropdown list. |
| Study Period length | Enter the Study period length |
| In/Before/After | You can select before or after from dropdown |
| Enrolment date that relate to this instalment | You can select enrolment date from the dropdown list. |
| Invoice Due Date no of Days after the Invoice date | You can add invoice due date no of Days after the Invoice date. |
| Additional Fees | Select additional fees from dropdown list if any. |
| Copy these rules to future installments | Tick this box if you want these rules for your future installments. If you tick this box then In/Before/Months field will be selected as On and the Enrolment date that relate to this instalment field will show days in dropdown list |
If you have any queries, please do not hesitate to contact us on 1300 85 05 85 or email us on support@rtosoftware.com.au

